Showing posts with label kid friendly. Show all posts

Oven Barbecue Pineapple Chicken

Monday, July 18, 2011

Oh my goodness it is hot!  They said on the news that the heat index hit 129 degrees today!  David, Daniel, and I went to Abbe Hills Farm to pick up our vegetables this afternoon and it was so hot we could barely stay outside long enough to get our loot!  Daniel and David were drenched in sweat by the time we got back to the car and we were only out about 10 minutes.  Poor Daniel doesn't understand that we can't go outside, he keeps saying "Mommy cool down sun."  I wish I could, if only it were that simple.  I will be so glad when this heatwave is over, although it isn't supposed to end until AT LEAST Thursday.  Yuck.  I think it might be time to go back to Seattle now :).  
Anyway, tonight, even though it is miserable to cook, I made Oven Barbecue Pineapple Chicken served over brown rice and with broccoli on the side.  This recipe is very yummy and very popular in my house!  It is perfect for a hot summer when you don't want to deal with the heat of the grill on top of the heat of the air outside.  


Oven Barbecue Pineapple Chicken


  • 4 boneless, skinless chicken breasts
  • 1 (20 oz) can pineapple chunks, juice reserved or 2 cups fresh pineapple chunks, juice squeezed out and reserved
  • 1 (16 oz) bottle honey barbecue sauce (watch for HFCS on the label, I recommend Stubb's or Trader Joe's brands)
  • 1 small onion, diced
  • 2 cloves garlic, minced
Preheat oven to 350 degrees.  Spray a 13X9 inch baking dish with cooking spray.  Spread the onions and pineapple along the bottom of the baking dish and place chicken on top.  In a small bowl mix together the bbq sauce, the pineapple juice, and the garlic.  Pour over the top of the chicken.  Bake covered for 30 minutes then remove the cover, turn the chicken in the sauce, and bake an additional 20 - 30 minutes until chicken reaches an internal temperature of 165 degrees or is no longer pink in the thickest part.

Until next time, happy and HEALTHY cooking and EATING - and STAY COOL!

Ham and Cheese Lasagna Rolls

Saturday, April 30, 2011

HUGE GIVEAWAY GOING ON UNTIL FRIDAY MAY 6TH!!!
STARBUCKS COFFEE TO 3 LUCKY WINNERS
PAMPERED CHEF CHILI LIME RUB TO 2 LUCKY WINNERS
SEVERAL TRIPS TO MEXICO WHILE SUPPLIES LAST!
NO PURCHASE NECESSARY!

This is a recipe that I used to make all the time, but haven't made since before Daniel was born.  Not necessarily this particular lasagna roll, but lasagna rolls in general.  I used to make them ALL THE TIME.  I don't know why I haven't made them in so long...maybe it was just one of those things that got lost in my repertoire when I moved from one state to another, had a child, and life changed.  Whenever I used to make them I got rave reviews.  I used to make all sorts, from gorgonzola walnut to regular old tomato basil and cheese.  Lasagna rolls easy to make and the perfect make ahead, throw in the oven later recipe.  These ham and cheese roll ups were always a hit, especially with my husband.  I decided to make them because he came up to me last week and said "you know what you haven't made in awhile?"  and then mentioned he'd really like me to make these.  I hope you enjoy them as much as we do.  

Ham and Cheese Lasagna Rolls


  • 12 lasagna noodles, cooked according to package directions
  • 1 (16 oz) tub ricotta cheese
  • 1 cup grated mozzarella cheese
  • 1 cup grated swiss cheese
  • 1/2 cup grated parmesan cheese
  • 2 cups homemade or store bought Alfredo sauce (I like to use Newman's Own when I don't make my own)
  • 1/2 lb deli ham, chopped (I like to ask the deli to chop it fresh because I am quite leery of the deli counter...those of you who read often know that about me:) )
  • 2 eggs
Preheat oven to 400 degrees (skip this step if you are making ahead, and heat oven when ready to bake).  Pour half of the Alfredo sauce into the bottom of a 13X9 casserole dish (I like to use my 13X9 stone), and spread evenly over the bottom, set aside.  In a medium bowl, mix together the ricotta, the ham, the eggs, and half of each of the cheeses (so 1/2 cup of the mozzarella, 1/2 c. of the swiss, and 1/4 cup of the parmesan).  Spread a generous amount of ham and cheese filling evenly onto one of the lasagna noodles, and roll up.  Place the roll seam side down in the casserole dish.  Repeat with remaining noodles and filling.  Pour the remaining Alfredo sauce over the rolls and spread evenly.  Sprinkle the rest of the cheese over the rolls.  If making ahead, cover with foil or plastic wrap and place in the fridge.  Can be made at least one day ahead.  If baking right away, place in the preheated oven, covered with foil, for 20 minutes.  Remove the foil and bake an additional 10 minutes or until the cheese is bubbly.  I like to serve these with a side of broccoli or asparagus.  

Until next time, happy and HEALTHY cooking and EATING!

Emergency 3 Cheese Mac and Cheese and the Great Kitchen Accident

Wednesday, March 30, 2011

Fair Warning- This post might potentially be a little gory.


So tonight, while preparing dinner, I managed to slice tip of my thumb off using a cheese grater!  I promptly called my friend Melissa who is a veterinarian to come and see if I needed stitches.  She is a SAINT.  God Bless her.  I have NO IDEA what I would do without Melissa.  She is a good friend.  Plus, I figured if I had to go get stitches, she would be able to tell instantly.  Unfortunately it wasn't an injury that could be fixed with stitches.  Melissa made a really good bandage for it and helped to slow the bleeding.  She also helped me finish dinner, which is not easy to do with one hand and a starving 2 year old.  David was working a 12 hour shift today so he wasn't going to be home until late.  Anyway, I had planned to make my regular old macaroni and cheese, but plans changed.  This makeshift mac and cheese, which I am calling "emergency" turned out super yummy and it was SUPER easy...easy enough to make with one hand!  Of course, I had already grated all the cheese...and half of my thumb! Haha.  Instead of making the cheese sauce from scratch, I was lucky and in the cupboard I happened to have a jar of Newman's Own Alfredo that I used.  It turned out SO yummy!


Emergency 3 Cheese Mac and Cheese

  • 1 (16 oz) box spiral pasta, cooked according to package directions
  • 1 (15 oz) jar Alfredo sauce (I used Newman's Own but you could use refrigerated, or even leftover homemade- just be careful of the ingredients list).
  • 2 cups of three grated cheeses of your choice (I used swiss, cheddar, and parmesan)
  • 1/2 cup frozen peas
Preheat oven to 400 degrees, spray a 13 X 9 inch baking dish with cooking spray.  Mix the pasta with Alfredo sauce, the peas, and half of the cheese.  Pour into the baking dish and top with the remaining cheese.  Bake 10-15 minutes or until the cheese is melted and bubbly.  Yummy!

Daniel LOVED this and kept asking for "Mo macnoni tees" (more macaroni and cheese).  So cute!
Until next time, happy and HEALTHY cooking and EATING!


Ham and Cheese Twice Baked Potatoes

Wednesday, February 16, 2011

Be sure to head over to The Foodie Mommie Store to take part in this month's Valentine's Sale and Giveaway!


Twice baked potatoes are something we eat a lot of in our house.  They are easy, versatile, easy on the pocketbook, and VERY yummy!  I make several different varieties, including my cheesy chili potatoes.  Last night I made Ham and Cheese potatoes.  These are great for a stress free weeknight dinner!  I served them with steamed broccoli.  Don't like swiss cheese?  Why not try cheddar or mozzarella instead! 

Ham and Cheese Twice Baked Potatoes
  • 3 large baking potatoes
  • 1/2 lb ham, diced
  • 2 cups cauliflower florets, steamed and mashed
  • 1/2 cup sour cream
  • 1 cup swiss cheese, grated
  • 1/4 tsp. dijon mustard
  • 1 tsp. dried thyme or herbes de provence
Preheat oven to 400 degrees.  Prick potatoes twice with a fork.  Place potatoes in the preheated oven, directly on the rack, and bake for one hour or until a fork inserted into the middle goes in without resistance (you can also "bake" your potatoes in the microwave if you prefer, but I like the oven better).  Allow the potatoes to cool slightly (don't turn off your oven).  Cut them in half lengthwise and carefully scoop out the flesh from the potato into a medium bowl, being careful to leave the skins in tact.  Grease a baking sheet generously and line up the potato skin shells.  To the potato flesh, add the rest of the ingredients and half of the cheese.  Mix well.  Scoop potato mixture into the shells, top with the remaining cheese.  Bake in the oven for another 10-15 minutes or until the cheese is melted and the potatoes are heated through.  YUM!

Until next time, happy and HEALTHY cooking and EATING!

Braised Short Ribs with Cheddar Polenta

Wednesday, February 02, 2011

Hello Friends!  I hope all of you are well since I last posted.  I had knee surgery last Monday and am starting to heal up nicely.  I am still in pain and walking on crutches but started physical therapy today so I am hoping that things will continue to go smoothly and my knee will heal.  I am anxious to get back to my active lifestyle!  Anyway, last week my mom came to stay and help me out and this week her best friend, whom I call Auntie Raven, is here!  


Last week, while restricted to my bed, I was watching the Today Show and Melissa d'Arabian was on making  braised short ribs with polenta.  I had never made short ribs before and they looked really intriguing.  Even more intriguing was that she said the entire meal was only $10!   I went online and printed the recipe and Auntie Raven and I decided to make it for dinner tonight! Instead of serving the ribs with Melissa d'Arabian's recipe for polenta, I made my polenta, but used a mixture of cheddar and parmesan to change things up a bit!  If you are not a fan of polenta you can serve this dish over rice, noodles, mashed potatoes, even bread or biscuits!  Being me, of course, I made a few minor changes to the ribs.  Here is the original recipe.  Here is what Raven and I did:


Braised Short Ribs

  • 6 lbs bone in country style pork ribs (about 8 large ribs)
  • 2 tbsp. granulated garlic
  • 3 tbsp. olive oil
  • 1/2 stick butter
  • 2 carrots, chopped (if you want, you can use baby carrots, I would probably double this next time I made it because I am a carrot fan)
  • 1 large onion, or 2 medium onions chopped (to save time you could use a bag of frozen chopped onions)
  • 2 stalks celery, chopped
  • 4 cloves garlic, minced
  • 1 small can tomato paste (6 oz.)
  • 3 tbsp. apple cider vinegar
  • 1/2 tsp. crushed red pepper flakes
  • 2 bay leaves
  • 4 cups chicken stock
Preheat oven to 350 degrees.  Trim the fat from the meat.  Pat ribs dry and season with granulated garlic and pepper.  


Heat oil and butter in a large dutch oven or heavy duty stock pot that is OVEN SAFE.  Brown the meat on both sides, in batches if necessary, and set aside.  Add the chopped vegetables, except the garlic, and saute about 5 minutes or until onions are soft.  


Add the minced garlic and saute another two minutes stirring frequently.  Add the tomato paste and cook, stirring, until well combined with the vegetables, about 1 minute. 


 Add the vinegar to the pan, and scrape up all the brown bits from the bottom (this is called deglazing).  Add the red pepper flakes and bay leaves.  Place the meat back in the pot on top of the vegetables.  


Pour in the chicken stock until it is halfway up the pot (you may not use all of the chicken stock).  You don't need to cover all of the meat.  Cover the pot and bring to a simmer.  Once it simmers, place the pot, cover on, in the oven.  Allow to braise in the oven for 1 hour and 30 minutes.  Remove the cover and continue to cook for an additional 2 and a half hours, stirring occasionally, until the liquid is reduced by half.  This will allow the meat to become tender and liquid to reduce in volume. Remove the bay leaves after cooking.


Remove from the oven, and serve meat with sauce over a bed of polenta, or  your favorite side.  This meal freezes easily.  The leftover meat is also excellent served on sandwiches, hot or cold!


This meal takes a long time to make, but it is easy because it is made in one pot.  The prep time is about 20 minutes and then the cooking time is fairly hands off.  Not only is the dish easy to prepare, it is also VERY kid  and budget friendly, thus WORTH THE EFFORT!  I highly recommend it.  I am going to give this recipe the "Daniel Favorite" rating because Daniel ate it up and asked for "MO MO PORK"  not once but TWICE!

Easy Peasy Cheesy Enchiladas

Wednesday, January 12, 2011

AWESOME JANUARY PAMPERED CHEF GIVEAWAY AND SALE!! WIN THE FREE PRODUCT VALUE FROM THE SALE (POSSIBILITY OF $15 TO UP TO $250 IN FREE PRODUCTS!) HEAD OVER TO THE FOODIE MOMMIE STORE FOR MORE DETAILS!


My mom used to make these enchiladas when I was growing up.  I remember my brother and I loving them and asking her to make them.  I think she cut this recipe out of the local paper when I was probably somewhere around 8.  Daniel also LOVES these!  What I like about this recipe is that calls for simple ingredients, and comes together fairly quickly.  I hope you will give it a try!


Cheese Enchiladas
  • 1 tbsp. olive or vegetable oil
  • 1 onion, chopped
  • 3 cloves garlic, minced
  • 1 (16 oz) jar salsa
  • 1/2 tsp. cumin
  • 1/8 tsp. cayenne pepper
  • 2 cups jack cheese
  • 1 (16 oz) tub ricotta cheese
  • 1 (4 oz) can diced green chilies
  • 8 flour tortillas
  • 1 small can sliced olives
Preheat your oven to 400 degrees and grease a 13X9 inch glass baking dish generously with cooking spray.  Saute onions and garlic over medium high heat in the olive oil until onions are translucent.  Add the salsa and cook until heated through.  Remove from heat and spread half of this mixture on the bottom of the baking dish.  Meanwhile, in a medium sized bowl, mix together the ricotta, half of the jack, the chilies, the cayenne and the cumin.  Fill each tortilla with an equal amount of cheese mixture.  To fill the tortillas, place filling in the middle, fold in the sides and roll up as you would a burrito.  Line each filled tortilla in the baking dish.  Top with remaining salsa mixture, remaining cheese, and  olives.  Bake for about 15 minutes or until hot and bubbly!

New Griddle For Christmas = French Toast

Sunday, January 09, 2011

AWESOME JANUARY PAMPERED CHEF GIVEAWAY AND SALE!! WIN THE FREE PRODUCT VALUE FROM THE SALE (POSSIBILITY OF $15 TO UP TO $250 IN FREE PRODUCTS!) HEAD OVER TO THE FOODIE MOMMIE STORE FOR MORE DETAILS!


I love to make a big weekend breakfast and French Toast has to be my all time favorite breakfast!  For the longest time, I couldn't make it properly at home because I didn't have a griddle.  That all changed when David got me a FABULOUS electric reversible griddle for Christmas!  It is a griddle on one side and a grill on the other! You cannot believe the excitement!  You can cut these into sticks for your kids and give pure maple syrup on the side for dipping.  I also freeze the leftovers for future breakfasts!


Family Breakfast French Toast

  • 1 Brioche Loaf (this recipe is for apple cinnamon brioche, you can omit the applesauce to make it just plain- or you can use store bought brioche, challah, or Texas Toast), sliced into 3/4 inch thick slices
  • 8 large eggs
  • 1 cup buttermilk
  • 1 tsp. orange extract
  • 1 tsp. vanilla extract
  • 1/4 cup honey
  • butter for greasing the griddle (even if your griddle is non stick, you still need to butter it generously)

Whisk together the eggs, buttermilk, extracts, and honey in a medium bowl.  Arrange the brioche slices in a large flat dish (such as a baking dish).  Pour the egg mixture over and turn the slices to coat.  Allow to soak in egg mixture for 5 minutes, turning occasionally.  Set griddle to medium high heat (or place on stove over medium high heat) and grease generously with butter.  Place as many brioche slices on the griddle as will fit without crowding and cook on each side approximately 10 minutes, or until golden brown.  Flip and cook on the other side the same amount of time.  Serve with powdered sugar, maple syrup, or fresh fruit!

Taco Shepherd's Pie

Wednesday, January 05, 2011

AWESOME JANUARY PAMPERED CHEF GIVEAWAY AND SALE!! WIN THE FREE PRODUCT VALUE FROM THE SALE (POSSIBILITY OF $15 TO UP TO $250 IN FREE PRODUCTS!) HEAD OVER TO THE FOODIE MOMMIE STORE FOR MORE DETAILS!


I got the idea for this recipe from Betty Crocker.  It sounded really yummy but it had a lot of  ingredients that were on my "yucky no no" list, so I decided to make it over into a Foodie Mommie version!   This is a great use up for leftover mashed potatoes, and it comes together in a flash! What a hit this turned out to be! YUM!

Taco Shepherd's Pie
  • 1 lb ground turkey (or you can use extra lean ground beef)
  • 1 onion, diced
  • 1 cup salsa
  • 1 (15 oz) can black beans
  • 1 (6 oz) can diced green chilies
  • 1/2 cup frozen (or fresh) corn
  • 1 pkg. taco seasoning (make sure it is MSG free!)
  • 2 cups plain mashed potatoes (I boil whatever potatoes I have on hand and then mash them)
  • 1 cup cheddar cheese, shredded
  • 1/2 cup sour cream (plus more for serving if desired)
  • 1 cup crushed tortilla chips (I like to use blue chips)
Preheat oven to 400 degrees.  In a large, oven proof skillet, cook the turkey and onion over medium high heat until the turkey is no longer pink.  Add taco seasoning, the salsa, the black beans, the green chilies and the corn.  Allow to simmer over low heat to heat through for about 5 minutes. In the meantime, mix the mashed potatoes with half of the cheese and the sour cream.  Spread the mashed potatoes evenly over the taco meat.  Top with the remaining cheese and tortilla chips.  Transfer to the oven and bake until cheese is melted and bubbly.


Oatmeal with Dried Fruit

Wednesday, November 03, 2010


Oatmeal is one of my breakfast favorites.  It is easy to prepare, inexpensive, and so versatile.    I use whatever dried fruit I have on hand (which is usually apricots, dried cherries, and raisins) and sometimes I toss in some chopped pecans for good measure. I usually make up a huge pan of oatmeal and then store it in the fridge during the week for a quick breakfast. I am lucky because Daniel LOVES, LOVES oatmeal!  He calls it "eelmeel." I make oatmeal for breakfast in the fall and winter because it makes me feel all warm and cozy, and that is definitely a plus here in the midwest.

Oatmeal with Dried Fruit
  • 2 cups rolled oats
  • 4 cups water
  • 3 tbsp. butter
  • 1/4 cup honey
  • 1 cup dried fruit (I use whatever I have on hand, today it was chopped apricots and raisins, but sometimes I use dried cherries and apricots, or crasins and apricots)
  • 1 tsp. cinnamon 
  • 1/4 cup chopped pecans (if desired)
  • milk for serving
In a medium saucepan, bring the water to a rolling boil over high heat.  Turn the heat down to medium and add the oats, butter, honey, fruit, and cinnamon.  Simmer, stirring frequently, about 10 minutes or until the oatmeal has thickened and the dried fruit has reconstituted.  Add in the pecans if using.  I like to serve this with a little bit of milk.

You can also substitute steel cut oats for the rolled oats and do this in the crock pot.  

Until next time, happy and HEALTHY cooking and EATING!

Cheesy Burger Pizza

Monday, November 01, 2010


Be sure to head over to The Foodie Mommie Store to take advantage of the November Pampered Chef Sale!  Order by November 15th and get 10% off!

I hope you all had a fun Halloween!  Here is a picture of my little giraffe and  I out trick or treating!

So I was getting really tired of the same old pepperoni pizza on Friday night.  David LOVES pepperoni and wants it every week, but I like a little variety.  Since David has been working nights, I decided to change it up a little with this pizza meets hamburger recipe!  Both Daniel and I really liked it and I will definitely make it again.  I was kind of just experimenting and it came out really well!  I used olives to make a Halloween face on it.  Try it, you will like it!

Cheesy Burger Pizza

  • 1 recipe pizza dough or prepared pizza dough
  • 1 lb ground beef or turkey
  • 1 onion, chopped
  • 1 clove garlic, minced
  • 2 tbsp. worcestershire sauce
  • 2 tbsp. tomato paste
  • 1 tbsp. yellow mustard
  • 2 cups shredded cheese (I used a mix of mozzarella, swiss, and cheddar)
  • 1/4 cup sliced olives (optional)
  • 1 tbsp. olive oil
Preheat oven to 400 degrees. Spray a large bar pan (I use my stoneware bar pan) or jelly roll pan generously with cooking spray.  Press the pizza dough into the pan making sure it goes up the sides.  In a large skillet, cook the ground meat, the garlic, and the onion on medium high heat until the meat is almost cooked through and the onion is translucent.  Turn down the heat to medium and add the worcestershire sauce, the tomato paste, and the mustard and cook, stirring frequently until thick, hot, and bubbly and the meat has cooked all the way through.  Pour the meat mixture evenly over the pizza crust.  Top evenly with cheese and olives (if using).  Bake 20-25 minutes or until cheese is melted and  bubbly.  


Happy and HEALTHY cooking and EATING!


Pull Apart Pizza

Wednesday, October 27, 2010

Be sure to head over to The Foodie Mommie Store to take advantage of the November Pampered Chef Sale!  Order by November 15th and get 10% off!

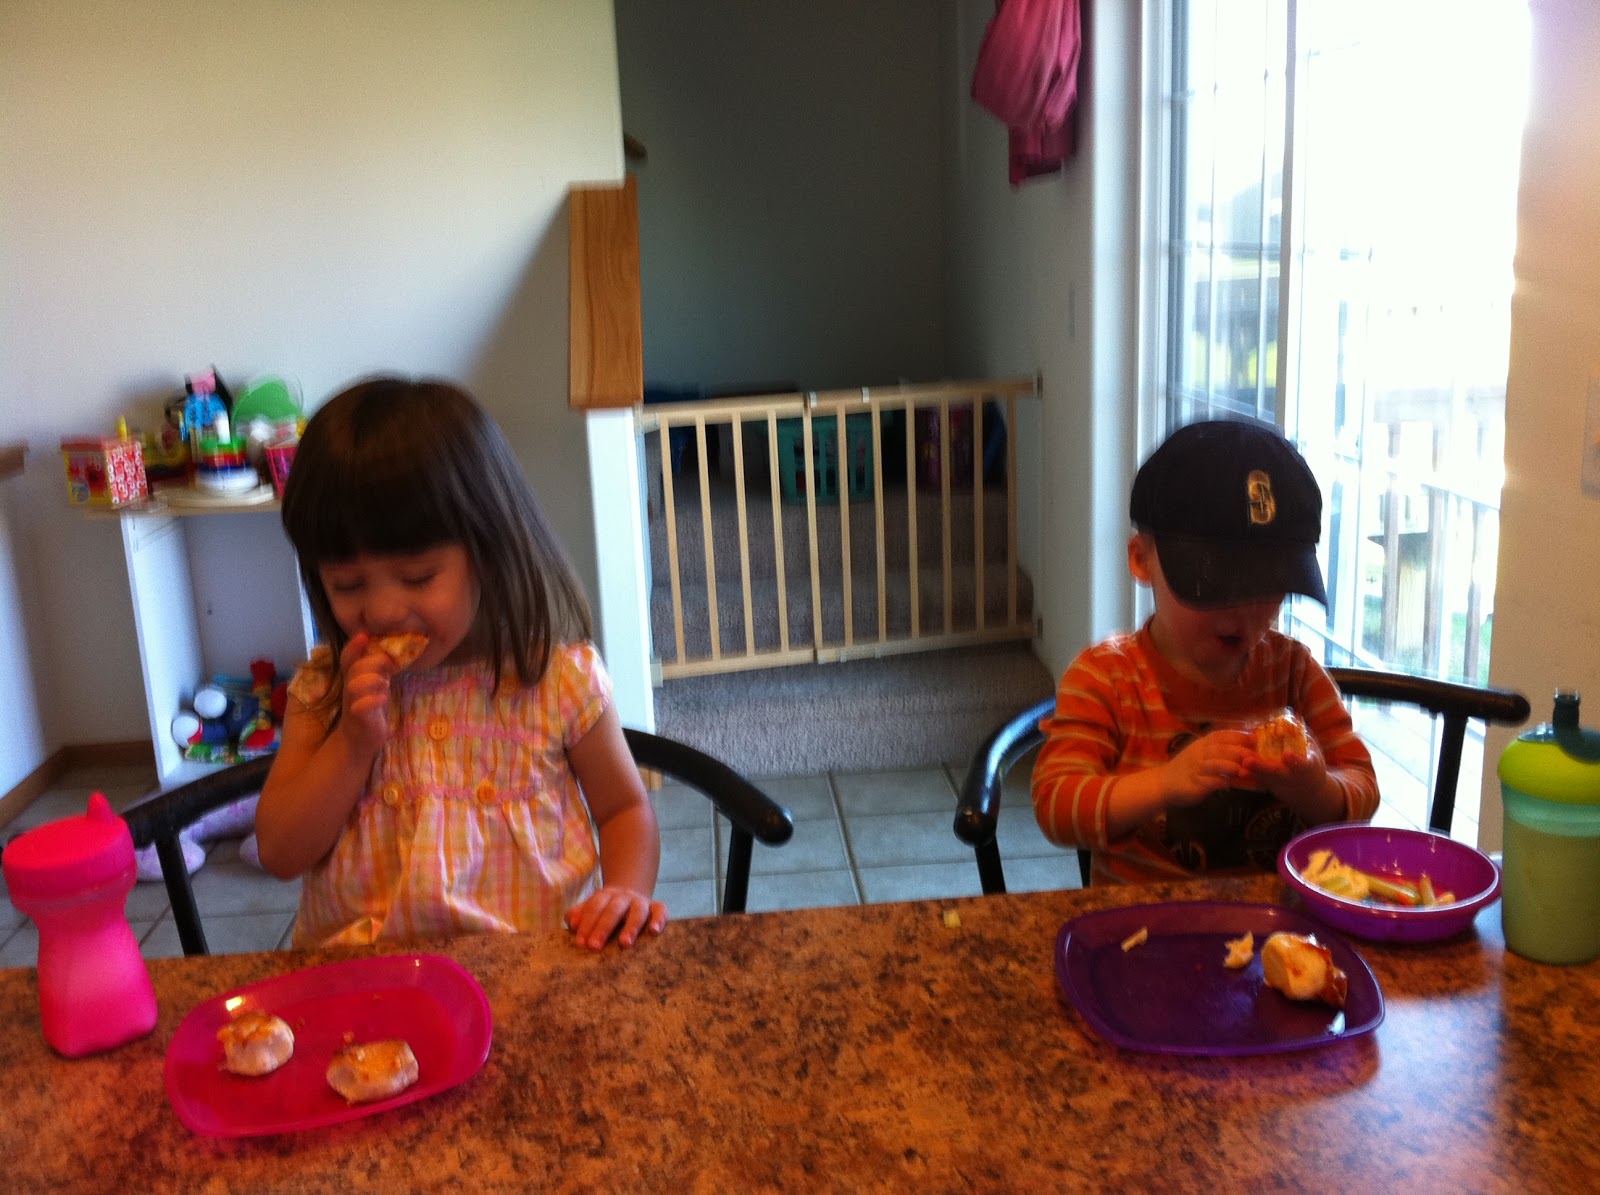
My friend and neighbor Julie (mother of Daniel's bff Aubrey) is hosting a Pampered Chef party next Sunday afternoon.  Last week we were going over some of the recipes she was interested in having demoed for her cooking show, and we came across this one.  Today we got together for lunch at Julie's house and decided to give it a trial run (by the way, Julie's house is EXACTLY the same as mine, EXACTLY- just in case you were noticing from the picures)!  Let me tell you, what a hit with the kids!  Of course, we made it a little differently than the recipe that the Pampered Chef offers, but the idea is the same and it is SO easy!  Give it a try!

Pull Apart Pizza
  • 2 tubes refrigerated bread dough (like Pillsbury, I typically don't like Pillsbury but they are redeeming themselves by changing the ingredients in their products and offering more natural choices)
  • 2 cups shredded cheese of your choice (Julie and I used a mix of mozzarella, parmesan, and cheddar and then because I had some leftover from last night, we topped the pizza with a few fresh small mozzarella balls)
  • approx. 3/4 cup pizza sauce
  • your favorite pizza toppings (we used pepperoni)
  • 1 tbsp. olive oil
Preheat oven to 400 degrees.  Spray a large pizza stone generously with cooking spray or olive oil.  Cut each loaf of dough in half lengthwise about 3/4 of the way through.  Then cut each loaf crosswise creating 32 half moons (16 from each loaf).  Arrange on the stone so that they are just touching, leaving a 1/2 inch border around the outside.  Brush lightly with olive oil and bake 14-16 minutes or until crust is golden brown.  Top the "crust" with pizza sauce, cheese, and your favorite toppings.  Bake another 5 minutes or so until cheese is melted and bubbly!

The kids love this because they were able to pull pieces off, and the pieces were just the right size for them!


Until next time, happy and HEALTHY cooking and EATING!

Foodie Mommie Recipe Make-Over: Cheeseburger Hoagie Sandwiches

Tuesday, October 19, 2010


The Foodie Mommie October Sale ends TOMORROW at 10 pm!  Don't forget- 10% off your entire purchase of Pampered Chef Products! Visit the Foodie Mommie store to take advantage of this great offer!


Here's a super quick and easy recipe brought to you by The Pampered Chef and made over in true Foodie Mommie style!  This is also one of Daniels favorites.  It comes from The Pampered Chef It's Good for You cookbook.  I really like the Pampered Chef recipes and cookbooks but sometimes they call for ingredients on my "yucky no-no" list, in which case I need to make them over!


Cheeseburger Hoagie Sandwiches


  • 1 lb ground turkey or beef
  • 1 (8 oz.) package grated cheddar cheese (or I like to use a cheddar jack blend)
  • 1 onion, chopped
  • 1 garlic clove, minced
  • 1/4 cup ketchup
  • 2 tbsp. yellow mustard
  • 1/2 cup pureed squash (optional)
  • Your favorite burger toppings (I like shredded lettuce, ketchup, mustard, mayonnaise, relish, sliced tomatoes, etc.)
  • 4 soft  hoagie rolls
 Cook the turkey or beef, onion, and garlic in a large, deep sided skillet over medium high heat.  Once the meat is no longer pink, add the ketchup, mustard, and squash and stir well to combine.  Turn heat down to medium low.  Add 1/2 the cheese and heat through until melted.  Cook another 5 minutes stirring frequently until mixture is hot and bubbly.  Spoon mixture into hoagie rolls and garnish with your favorite burger toppings and condiments.  Top each sandwich with remaining cheese.  Yummy!


Happy and HEALTHY cooking and EATING!

Individual Pizza Pot Pies

Monday, October 11, 2010

Registration is still open for the Crescent Dough Web Class!  Click Here to Register!!!!!
Check out the Goblin Gorp Giveaway!


I love this recipe, it is a great one for fall, really easy, and budget friendly!  I love to cut the crust into pumpkin shapes for Halloween, or other fun shapes at other times of the year! Kids like this meal because they get their own individual portion made especially for them!  Daniel LOVES this meal!  You can also make one large pot pie instead of individual if that works better for you!


Individual Pizza Pot Pies

  • 1/2 recipe crescent dough
  • 1 lb bulk italian turkey sausage or ground turkey
  • 1-2 ounces pepperoni, chopped
  • 1 bell pepper, any color you like, chopped
  • 1 onion, chopped
  • 1 cup spaghetti sauce or pizza sauce 
  • 1 cup mozzarella
  • 1/2 cup parmesan
  • 1 tsp. italian seasoning
  • 1 tsp. granulated garlic or 3 garlic cloves, minced
  • 1 tbsp. olive oil + 1 tsp. olive oil
Spray 4 ramekins generously with cooking spray.  Preheat oven to 375 degrees.  In a large, deep sided skillet heat the olive oil over medium high heat.  Add the sausage, bell pepper, herbs, garlic, and onion.  Saute 5-10 minutes stirring frequently until sausage is cooked through and onions are translucent.  Add the sauce and pepperoni and cook until heated through.  Spoon mixture into ramekins, fill to 3/4 of the way full.  Top with cheeses.  Roll out the crescent dough and cut into circles or fun shapes like pumpkins.  Layer the dough on top of the ramekins to form the crust. Brush the crust with olive oil.   Bake for 15 minutes or until tops are golden brown. Enjoy!

Until next time, happy and HEALTHY cooking and EATING!

My Moms Club Farmers Market

Saturday, October 09, 2010

On Thursday Moms Club of Marion had a Craft Show/Farmers Market to promote all of the "mompreneurs" in our group!  We are a group of approximately 50 members, most of us stay at home moms and a few stay at home dads!  This was a lot of fun!  I set up a table for The Foodie Mommie/The Pampered Chef and featured a few recipes!  
The Foodie Mommie Table at the
Moms of Marion Farmers Market/Craft Show


 I made three recipes for sampling at my table.  The first was the mini deep dish pizzas featured earlier this week on The Foodie Mommie.  The second was pumpkin shaped squash sugar cookies. This recipe came from adding 1 cup of pureed squash and 1 extra cup of flour to the Camp Huston Sugar Cookies.  Then when I rolled them out I used a pumpkin shaped cookie cutter to cut the cookies out and sprinkled them with a little orange sugar on top! They were a big hit!


The third recipe was a Sun dried Tomato and Pesto Torta.  This also was a HUGE hit.  I served it with homemade italian herb canapes.  Yum!


Sun Dried Tomato and Pesto Torta

  • 8 oz. cream cheese, softened
  • 1/4 cup oil packed julienne cut sun dried tomatoes
  • 1/4 cup pesto sauce (I used homemade but you can use any kind you like)
  • 2 tbsp. toasted pine nuts
  • 2 tbsp. balsamic vinaigrette (homemade or store bought - I recommend Newman's Own if you are going to use a store bought dressing)
Daniel and his friend Christopher enjoying
one of the squash sugar cookies (and some dried cherries)
Spray a small bowl or dish with cooking spray.  Line with plastic wrap and spray the plastic wrap.  Spread half of the cream cheese, covering the bottom and sides of the bowl or dish.  Spread the pesto on top of this.  Spread with the remaining cream cheese (it is ok if the pesto seeps through as this will be the bottom of your torta).  Cover with plastic wrap and place in the refrigerator a minimum of two hours and up to 8 hours (I usually prep the day before and place in fridge overnight).  When you are ready to serve, remove the plastic wrap from the dish, remove cream cheese mixture from the dish and unwrap the plastic wrap.  Place the cream cheese upside down on your serving dish so that the bottom is now the top.  Place the sun dried tomatoes over the top of the torta, then sprinkle with pine nuts and drizzle with vinaigrette.  Serve with crackers or canapes (canapes are small slices of bread).  

Until next time, happy and HEALTHY cooking and EATING!


Mini Deep Dish Pizzas

Thursday, October 07, 2010

It was meant to be.  Yesterday my mom called me to tell me about a fun recipe idea she had for Daniel.  Today I am setting up a table at my Moms Club Fall Bazaar and I needed some easy snack/appetizer type foods to share.  When my mom called with this idea, it was like fate!  She was meant to come up with this recipe idea, and I was meant to try it out!  Let me tell you what an awesome idea it was!  Mini Deep Dish Pizzas.  I even ALREADY HAD all the ingredients AND I got to use one of my nifty Pampered Chef gadgets!  I made these in mini muffin tins, but if you want them a little bigger you can use regular sized muffin tins.  So anyway, enough rambling, here is a SUPER EASY recipe that you can make with your kids!


Mini Deep Dish Pizzas

  • 1 recipe pizza crust (or any pizza crust you like- or you could use refrigerated crescent rolls or refrigerated biscuits - I have discovered Simply Pillsbury and they are GREAT because there is nothing yucky in them.)
  • 2 cups shredded mozzarella cheese (or any shredded cheese you like)
  • Your choice of pizza toppings - I made 24 pesto and cheese and 24 tomato and cheese, but you could cut up pepperoni, ham, veggies, anything you like.
Preheat oven to 375 degrees.  Generously grease two mini muffin tins (or regular muffin tins).  Roll about a teaspoonful of pizza dough (for reg. size do a tbsp.) into a ball and place into each muffin cup.  I used my Pampered Chef Mini Tart Shaper to press the dough into the tins to create a "pizza cup" but you can also use your fingers to line the tins with the dough.  Fill each cup with your preferred pizza sauce and toppings, top with cheese.  Bake for 15 minutes or until cheese is melted and crust is slightly puffed and golden.  

Daniel LOVED making these.  His favorite part was using the tart shaper to press the dough out into the muffin tins.  He also LOVED sprinkling the cheese on top of each "pizza."  


Anyway, I hope you all enjoy your day!  Until next time, happy and HEALTHY cooking and EATING!


The Foodie Mommie Copyright © 2009 Designed by Ipietoon Blogger Template for Bie Blogger Template Vector by DaPino