Showing posts with label grain. Show all posts

Braised Short Ribs with Cheddar Polenta

Wednesday, February 02, 2011

Hello Friends!  I hope all of you are well since I last posted.  I had knee surgery last Monday and am starting to heal up nicely.  I am still in pain and walking on crutches but started physical therapy today so I am hoping that things will continue to go smoothly and my knee will heal.  I am anxious to get back to my active lifestyle!  Anyway, last week my mom came to stay and help me out and this week her best friend, whom I call Auntie Raven, is here!  


Last week, while restricted to my bed, I was watching the Today Show and Melissa d'Arabian was on making  braised short ribs with polenta.  I had never made short ribs before and they looked really intriguing.  Even more intriguing was that she said the entire meal was only $10!   I went online and printed the recipe and Auntie Raven and I decided to make it for dinner tonight! Instead of serving the ribs with Melissa d'Arabian's recipe for polenta, I made my polenta, but used a mixture of cheddar and parmesan to change things up a bit!  If you are not a fan of polenta you can serve this dish over rice, noodles, mashed potatoes, even bread or biscuits!  Being me, of course, I made a few minor changes to the ribs.  Here is the original recipe.  Here is what Raven and I did:


Braised Short Ribs

  • 6 lbs bone in country style pork ribs (about 8 large ribs)
  • 2 tbsp. granulated garlic
  • 3 tbsp. olive oil
  • 1/2 stick butter
  • 2 carrots, chopped (if you want, you can use baby carrots, I would probably double this next time I made it because I am a carrot fan)
  • 1 large onion, or 2 medium onions chopped (to save time you could use a bag of frozen chopped onions)
  • 2 stalks celery, chopped
  • 4 cloves garlic, minced
  • 1 small can tomato paste (6 oz.)
  • 3 tbsp. apple cider vinegar
  • 1/2 tsp. crushed red pepper flakes
  • 2 bay leaves
  • 4 cups chicken stock
Preheat oven to 350 degrees.  Trim the fat from the meat.  Pat ribs dry and season with granulated garlic and pepper.  


Heat oil and butter in a large dutch oven or heavy duty stock pot that is OVEN SAFE.  Brown the meat on both sides, in batches if necessary, and set aside.  Add the chopped vegetables, except the garlic, and saute about 5 minutes or until onions are soft.  


Add the minced garlic and saute another two minutes stirring frequently.  Add the tomato paste and cook, stirring, until well combined with the vegetables, about 1 minute. 


 Add the vinegar to the pan, and scrape up all the brown bits from the bottom (this is called deglazing).  Add the red pepper flakes and bay leaves.  Place the meat back in the pot on top of the vegetables.  


Pour in the chicken stock until it is halfway up the pot (you may not use all of the chicken stock).  You don't need to cover all of the meat.  Cover the pot and bring to a simmer.  Once it simmers, place the pot, cover on, in the oven.  Allow to braise in the oven for 1 hour and 30 minutes.  Remove the cover and continue to cook for an additional 2 and a half hours, stirring occasionally, until the liquid is reduced by half.  This will allow the meat to become tender and liquid to reduce in volume. Remove the bay leaves after cooking.


Remove from the oven, and serve meat with sauce over a bed of polenta, or  your favorite side.  This meal freezes easily.  The leftover meat is also excellent served on sandwiches, hot or cold!


This meal takes a long time to make, but it is easy because it is made in one pot.  The prep time is about 20 minutes and then the cooking time is fairly hands off.  Not only is the dish easy to prepare, it is also VERY kid  and budget friendly, thus WORTH THE EFFORT!  I highly recommend it.  I am going to give this recipe the "Daniel Favorite" rating because Daniel ate it up and asked for "MO MO PORK"  not once but TWICE!

Minestra di Riso e Spinaci (Spinach and Risotto Soup) with Parmesan Garlic biscuits

Sunday, December 19, 2010


This soup is so yummy and turns out so creamy you will have no idea how good it is for you!  It is the perfect soup for a cold winter night. The risotto rice (also called Aborio) is the secret to this soup's creamy texture. Top it off with a sprinkling of parmiggiano reggiano (parmesan cheese).  I served this tonight with these FABULOUS parmesan garlic biscuits.  YUM!


Minestra di Riso e Spinaci (Spinach and Risotto Soup)
  • 1 onion, chopped
  • 4 cloves garlic, minced
  • 1 generous cup of aborio rice
  • 16 oz. baby spinach
  • 1 cup carrots, finely chopped
  • 8 slices cooked turkey bacon (or regular bacon), crumbled
  • 1 parmesan rind
  • 2 tbsp. olive oil 
  • 8 cups chicken stock or broth 
  • salt and pepper to taste
In a large soup pot or dutch oven, cook the onion, carrots, and garlic in the olive oil over medium high heat until onion is translucent and carrots begin to sweat, about 5 minutes.  Add the rice, and stir until well coated with the olive oil.  Add the stock and the rind.  Turn heat up to high and bring to a boil.  Turn down to medium low and simmer for 20 minutes or until the rice is very soft and creamy.  Add more liquid if needed.  Remove the rind, and add the spinach and cook another minute until wilted and bright green.  Stir int he bacon.  Adjust seasoning as needed.  Serve immediately.


Parmesan Garlic Biscuits
  • 2 cups all purpose flour
  • 4 tsp. baking soda
  • 2 tsp. sugar
  • 1/2 tsp. salt
  • 1 stick cold butter
  • 2/3 cup milk
  • 1 egg
  • 3 tbsp. Pampered Chef Parmesan Garlic Oil Dipping Seasoning (or 1 1/2 each granulated garlic and parmesan cheese)
  • 1/4 cup freshly grated parmesan cheese
Preheat oven to 450 degrees.  Mix together the flour, soda, sugar, salt, seasoning, and Parmesan cheese.   Cut in butter until mixture resembles coarse bread crumbs.  Mix in the egg and the milk until a stiff dough forms.  Knead dough 10-20 times and then roll out onto a dry surface.  If the dough is sticky, you can add a little flour to your surface.  Cut with a biscuit cutter.  Line up on a lightly greased cookie sheet (or an ungreased baking stone).  Bake 8-10 minutes or until golden brown and puffed up.  Serve with  more butter or plain! YUM!

Oatmeal with Dried Fruit

Wednesday, November 03, 2010


Oatmeal is one of my breakfast favorites.  It is easy to prepare, inexpensive, and so versatile.    I use whatever dried fruit I have on hand (which is usually apricots, dried cherries, and raisins) and sometimes I toss in some chopped pecans for good measure. I usually make up a huge pan of oatmeal and then store it in the fridge during the week for a quick breakfast. I am lucky because Daniel LOVES, LOVES oatmeal!  He calls it "eelmeel." I make oatmeal for breakfast in the fall and winter because it makes me feel all warm and cozy, and that is definitely a plus here in the midwest.

Oatmeal with Dried Fruit
  • 2 cups rolled oats
  • 4 cups water
  • 3 tbsp. butter
  • 1/4 cup honey
  • 1 cup dried fruit (I use whatever I have on hand, today it was chopped apricots and raisins, but sometimes I use dried cherries and apricots, or crasins and apricots)
  • 1 tsp. cinnamon 
  • 1/4 cup chopped pecans (if desired)
  • milk for serving
In a medium saucepan, bring the water to a rolling boil over high heat.  Turn the heat down to medium and add the oats, butter, honey, fruit, and cinnamon.  Simmer, stirring frequently, about 10 minutes or until the oatmeal has thickened and the dried fruit has reconstituted.  Add in the pecans if using.  I like to serve this with a little bit of milk.

You can also substitute steel cut oats for the rolled oats and do this in the crock pot.  

Until next time, happy and HEALTHY cooking and EATING!

Ham and Cheese Casserole

Saturday, October 02, 2010

I love to make my Ham and Cheese Casserole when the weather starts to turn cooler.  It is the perfect answer to a fall day.  I mix black forest ham, with brown rice, spinach, and cheese to make an easy, cheesy, casserole!  The best part is that it can be made ahead of time, and it can be easily frozen!


Ham and Cheese Casserole

  • 1/2 lb thickly sliced black forest ham,  diced (you can ask them to slice it thick at the deli counter)
  • 4 cups cooked brown rice
  • 1 cup carrots, cooked and chopped
  • 2 stalks celery, finely chopped
  • 1 cup sliced mushrooms (optional- David HATES mushrooms so I leave them out but if I am making this for a function then I put them in)
  • 1 onion, chopped
  • 1 clove garlic, minced
  • 1/2 lb bag fresh spinach, chopped
  • 2 tbsp. butter
  • 2 tbsp. flour (I like to use Wondra for sauces)
  • 1 cup milk
  • 1 cup swiss cheese, divided
  • 1 tbsp. italian seasoning
  • 1/2 tsp. nutmeg
  • 1 tsp. granulated garlic
  • salt and pepper to taste
  • 1 tbsp. dijon mustard
Preheat oven to 375 degrees.  In a small saucepan, heat the butter, garlic, celery, and onions over medium high heat until melted and the onions are translucent.  Add the flour and whisk together until stiff.  Slowly add the milk, whisking constantly until the sauce is thickened and smooth.  Add the dijon, the italian seasoning, the nutmeg, the salt and pepper and half of the swiss cheese.  In a bowl, mix the rice, carrots, mushrooms (if using), spinach, and sauce.  Pour this mixture into a greased baking dish (Hint- I bake this casserole in my Pampered Chef Stoneware Rectangular Baker) and top with the rest of the cheese.  Bake uncovered for 25-30 minutes or until the cheese is melted on top and the casserole is heated through.  

Until next time, happy and HEALTHY cooking and EATING!


Last Minute Pear Cake

Thursday, September 30, 2010

Today I needed to come up with something easy to bring to a get together tomorrow.  I had some pears that were on the verge of going bad so I decided to make a pear cake. Unfortunately I didn't have all the ingredients for my recipe, so I substituted butter for oil, and a few other ingredients and this was the result!  So moist and yummy, I think I will stick with this one from now on!
You could probably substitute apples, bananas, or other fruit for the pears.  This makes two cakes.


Last Minute Pear Cake

  • 3 cups pears, peeled and chopped (about 6 pears)
  • 6 eggs
  • 3 sticks of butter, VERY soft (I stuck them in the microwave for about 30 seconds)
  • 4 cups sugar (yes, I know it has a lot of sugar)
  • 6 cups all purpose flour
  • 2 tbsp. cinnamon
  • 2 tsp. salt
  • 2 tsp. baking soda
  • 1 1/2 tsp. vanilla extract
Preheat oven to 350 degrees.  Spray two 10 inch tube pans (bread loaf pans) generously with cooking spray.In a large mixing bowl, beat the eggs and the butter together.  Add sugar and beat until smooth and creamy.  In another bowl combine the flour, cinnamon, salt, and baking soda.  Pour the flour mixture into the sugar mixture a little at a time, incorporating all of the dry ingredients with the wet before adding more dry.  Add the vanilla and the pears and mix well.  The batter will be slightly stiff.  Pour the batter equally into each of the greased pans.  Bake for 65-75 minutes or until a knife inserted near the center comes out ALMOST clean.  

Until next time, happy and HEALTHY cooking and EATING!

Salmon Risotto

Monday, September 27, 2010


ONLY TWO DAYS LEFT TO TAKE ADVANTAGE OF THE FOODIE MOMMIE GRAND OPENING SALE!  Don't Forget to stop by The Foodie Mommie Store between now and WEDNESDAY (September 29th)   Lots of great deals and SUPER giveaways!

Risotto is a really easy dinner that is usually a crowd pleaser.  I change my risotto up many different ways, but I think my salmon risotto has to be my favorite.  

Salmon Risotto
  • 1 lb salmon fillet, cooked and flaked (or you can also use canned salmon if you want)
  • 1 recipe lemon dill risotto
  • 1/4 cup peas
Cook the risotto according to the recipe provided in the link.  In the last 5 minutes of cooking, add the peas and the salmon.  Serve with extra parmesan if desired.

Until next time, happy and HEALTHY cooking and EATING!

Garden Vegetable, Sausage, and Polenta Bowls and Sweet Potato Blondies

Thursday, June 24, 2010


HAVE YOU ENTERED THE "MAKE YOUR OWN BABY FOOD KIT" GIVEAWAY YET?  
IF NOT, BE SURE TO CLICK HERE!  CONTEST ENDS JULY 1ST!

I happen to love all the seasons, but Summer and Fall have to be my favorites because of all the beautiful and fresh produce.  Another one of my favorite things is polenta.  I LOVE polenta!  In this dish, I marry my love for polenta and garden fresh vegetables with italian sausage to make a dish that will make your mouth water!  I rounded the meal off with a lovely Sweet Potato Blondie for dessert.  YUM!


Garden Vegetable, Sausage, and Polenta Bowls

  • 1 recipe Soft Polenta
  • 1 lb bulk italian sausage (hot or sweet)
  • 2 large zucchini, chopped into large chunks
  • 1 onion, sliced (I used spring onions tonight because that is what we got at the farm, but usually I make this with a regular old yellow onion)
  • 1 pint grape tomatoes
  • 1 lb. leafy greens, chopped, such as spinach, kale, chard or a mixture of those (I used kale and chard tonight because that is what we got at the farm)
  • 4 cloves garlic, minced (I used chopped garlic scapes tonight.  Garlic scapes are the tops of the garlic that flower.  They are quite good and have a mild garlic flavor.  They look like this: 


We got them at the farm today, so if you are lucky enough to get them from your CSA, I would highly recommend using them in this dish, otherwise, regular old garlic is what I normally use and it tastes just as yummy).

  • 2 tbsp. olive oil
  • 1 tbsp. italian herbs
  • Parmesan cheese for serving if desired
In a large, deep sided skillet heat the oil over medium high heat.  Add the sausage and saute until well browned, 5-10 minutes.  Add the zucchini, the onion, the greens, and the garlic and saute another 3-5 minutes until the greens are wilted.  Add the tomatoes, cover the skillet, turn the heat down to medium low and let simmer another 10 minutes, stirring occasionally until the tomatoes "pop."  Serve over polenta and garnish with Parmesan, if desired.

Sweet Potato Blondies

  • 1 cup packed brown sugar
  • 1 stick butter, melted
  • 2 eggs
  • 1 tsp. vanilla extract
  • 2 cups flour
  • 1/2 tsp. baking powder
  • 1/2 tsp. baking soda
  • 1/4 tsp. salt
  • 1/2 cup pureed sweet potato (today I used an orange one but you could use a white one)
  • 1 1/2 cups chocolate chips
Preheat oven to 350 degrees. Grease a 13X9 inch pan and set aside. In the bowl of an electric mixer, combine the brown sugar, butter, sweet potato, vanilla together, and add the eggs one at a time, beating well after each addition.  In another bowl, combine the flour, baking powder, baking soda, and salt.  Add the dry ingredients to the wet ingredients a little at a time, mixing until just combined.  It is very important that you do not over mix or your cookies will turn out very dense.  Bake for 18-20 minutes or until a knife inserted near the center comes out clean.  


Before I sign off, here are some gratuitous photos of my adorable son who insisted on wearing his shades this afternoon:


Until next time, happy and HEALTHY cooking and EATING!


Rosemary Steak Dijon Skillet

Monday, June 14, 2010


Here is a really delicious recipe that is a great use up for those fresh summer veggies. I happened upon this recipe by accident. One day I was planning to make my Rosemary Dijon Steak Brochettes but it was pouring down rain and I figured I wouldn't be able to use the grill that evening. Instead, I changed up the marinade a little, and sauteed the steak in a skillet with the vegetables. It turned out so yummy and so the recipe stuck! I serve this over couscous or quinoa, but you could serve it over rice or noodles, or all by itself, whatever you like!

Rosemary Steak Dijon Skillet
  • 2 lbs steak, cubed (I used bottom round but you can use any cut you like)
  • 1/2 cup dry white wine
  • 4 sprigs fresh rosemary, removed from the stems
  • 1/8 cup dijon mustard
  • 2 tbsp. steak sauce
  • 2 tbsp. Worcestershire sauce
  • 1/8 vegetable oil + 3 tbsp for cooking
  • 1 tbsp. garlic powder or 4 garlic cloves, minced
  • salt and pepper to taste
  • 1 large zucchini, chopped
  • 1 medium onion, sliced
  • 1 pint grape or cherry tomatoes
  • 1 cup sliced mushrooms (optional)
Place the steak into a large ziplock bag or Foodsaver bag. In a bowl, whisk the next 7 ingredients together until well combined. Stream in the vegetable oil, mixing well and pour over the steak. Seal the bag and marinate in the refrigerator 2-8 hours (or longer, the longer you leave it, the more flavorful it will be). After marinating the desired amount of time, heat the oil a large, deep sided skillet over medium high heat.  Add the steak and ALL of the marinade and cook, stirring frequently, until the liquid has reduced by half, about 5 minutes. 


Add the zucchini, the onion, and the mushrooms (if using) and continue to saute until the vegetables are soft, another 5 minutes. Add the tomatoes and cover. Cook until the tomatoes easily pop and release their juices, about 5 more minutes, then continue to cook uncovered, stirring frequently, another 5 minutes. Serve over noodles, couscous, quinoa, or rice.

I put the mushrooms as optional in this recipe because I leave them out. I happen to LOVE mushrooms, but David can't stand them and will not eat them. It's really unfortunate because mushrooms are totally yummy!


Anyway, that is all for now. Until next time, happy and HEALTHY cooking and EATING!


Oh, and here are some gratuitous shots of my adorable son playing in the sink. I'm not a proud mommy or anything =).


Salad Bar Sunday - Chicken Fajita Salad

Sunday, June 13, 2010

Tonight I thought I'd change my salad bar up a bit by doing a Chicken Fajita Salad. I love to do themed salad bars, and this one is one of my favorites. I just LOVE chicken fajitas! My fajita marinade is quite yummy, it makes the chicken really moist and tangy. I paired my chicken fajita mixture with a variety of salad bar options, tonight we had:


  • Crushed blue corn tortilla chips
  • Black Beans
  • A cheddar jack cheese blend
  • Salad greens from the farm
  • Brown rice
  • Sour Cream
  • Ranch Dressing

If you want chicken fajitas instead of chicken fajita salad, fill flour or corn tortillas with the chicken mixture, top with rice, beans, sour cream, and cheese! Yummy Nummy!


Chicken Fajitas

  • 2 lbs. boneless, skinless chicken breast, sliced against the grain
  • 1/4 cup white wine
  • 3 tbsp. + 1 tbsp vegetable oil
  • 1 1/2 tsp. kosher salt
  • 1 tsp. Italian seasoning
  • 1/2 tsp. cumin
  • 1/8 tsp. chipotle chili powder (or regular chili powder) - note that this stuff is REALLY hot if you use too much so a little bit goes a long way.
  • 1 1/2 tsp. sweet paprika
  • 1/2 tsp. pepper
  • 2 tsp. sugar
  • 2 tbsp. water
  • 1 tbsp. apple cider vinegar
  • 1 medium onion, thinly sliced
  • 1 green bell pepper, thinly sliced

Place the chicken in a ziplock or Foodsaver bag. In a small bowl, add the rest of the ingredients, EXCEPT the onion and bell pepper, and whisk together until well blended. Pour over the chicken, and seal the bag. Allow chicken to marinate a minimum of 30 minutes and a maximum of 4 hours in the refrigerator. Heat a deep sided skillet with 1 tbsp. vegetable oil. Add the chicken and saute about 5 minutes or until chicken is almost cooked through. Add the vegetables and saute another 5-10 minutes or until they are tender crisp.

This salad was SO yummy! Daniel really loved helping me wash the salad greens in the sink, and he liked being able to pick out the toppings for his salad!

I hope you will enjoy this recipe too! Until next time, happy and HEALTHY cooking and EATING!

Arancini (Italian Rice Balls)

Friday, May 21, 2010


Have you signed up for the web class on May 25th yet?  Click here to sign up!  Space is limited!


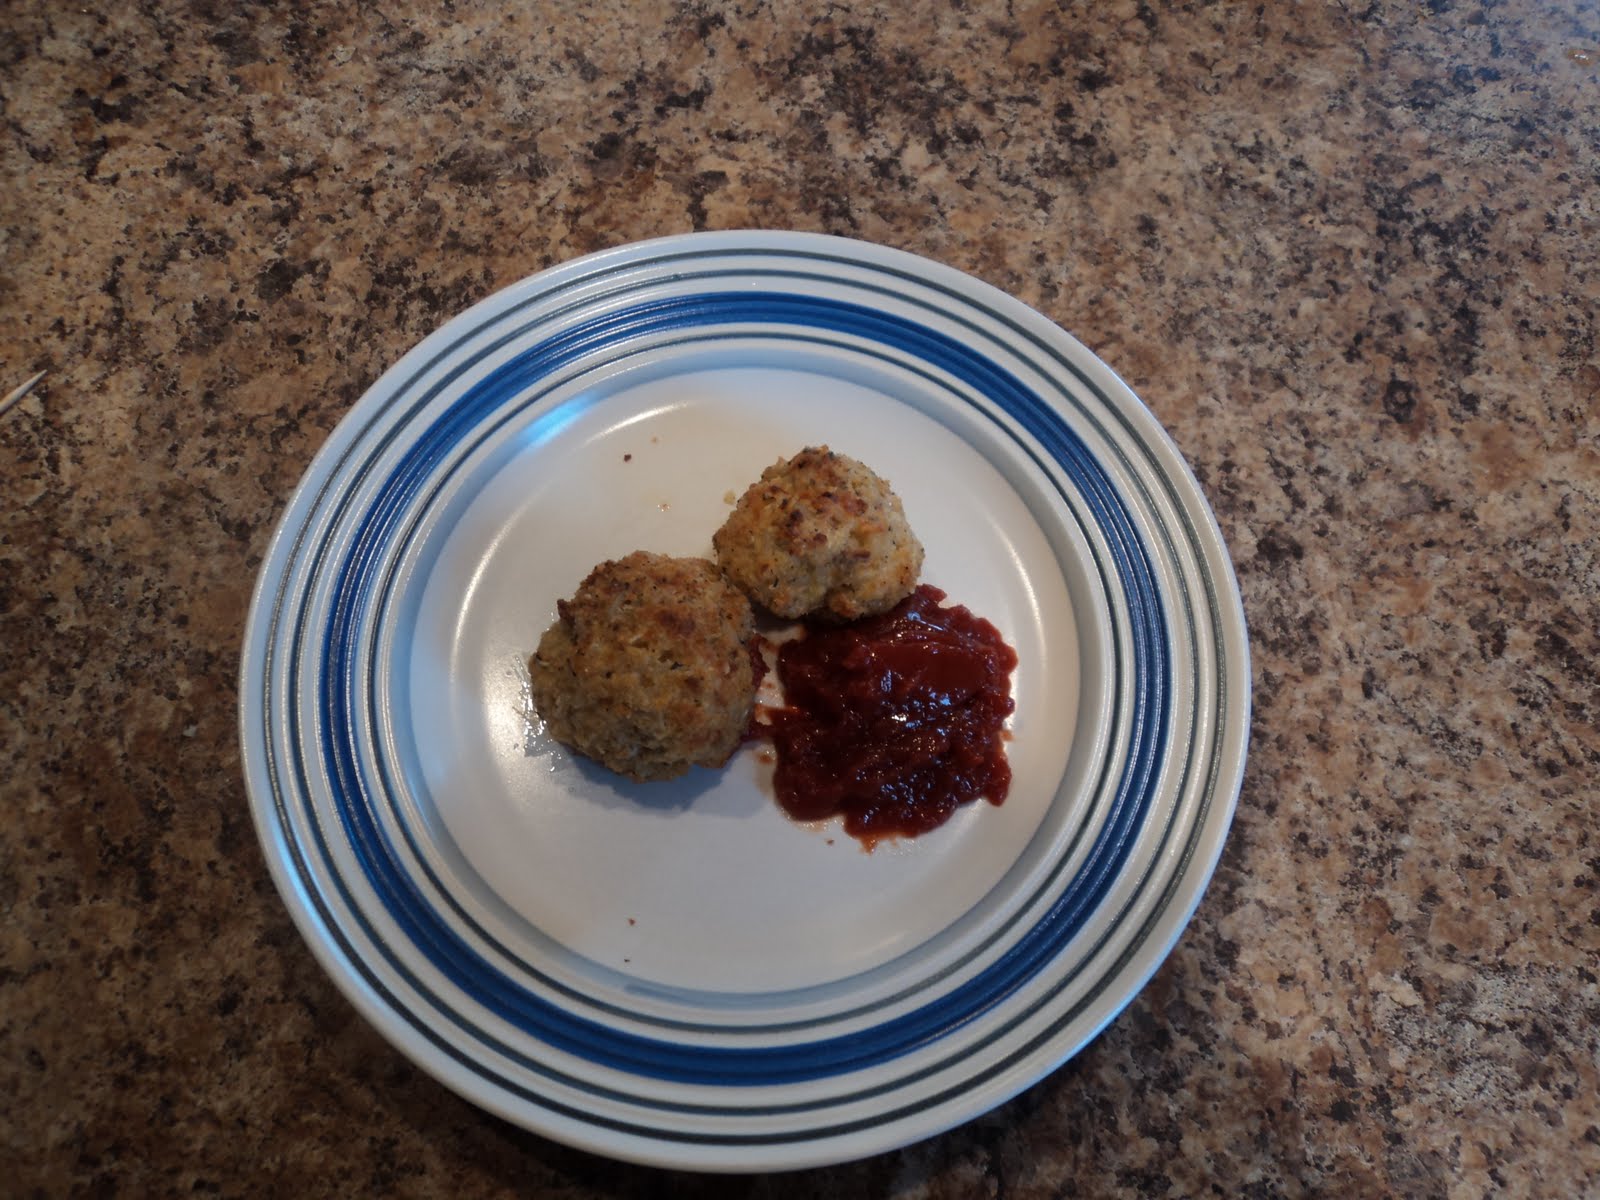
I hate wasting food. I feel that one of the biggest problems in this country is the amount of food waste we generate as a people.  There are countries in this world that don't have enough, and yet, we have oversized portions and massive amounts of waste.  One thing I like to do is use my leftovers in another meal or snack.  Arancini, which are Italian Rice Balls, are a great use up for leftover rice.  They make the perfect snack, appetizer, or light lunch.  I serve them plain or with ketchup.  Daniel LOVES Them.  My version of Arancini is not traditional by any means, but it sure is delicious!  The great thing about these too is that they can be easily frozen.  Traditional Arancini are deep fried, I oven fry mine.  


Elizabeth's Version of Arancini (Italian Rice Balls)

  • 1-2 cups cooked brown rice (you can use white rice too if you have that)
  • 2 large eggs, slightly beaten
  • 1-2 cups bread crumbs - divided
  • 1 cup pureed sweet potato, squash, or cauliflower
  • 1/2 cup mozzarella cheese or italian cheese blend, shredded
  • 1 cup parmesan cheese, divided
  • 1 tbsp. italian herbs
  • 1 tsp. granulated garlic or garlic powder
  • 6 slices turkey bacon, cooked and crumbled (I just microwave it between two paper towels for one minute per slice).
  • 4-6 tbsp. melted butter or olive oil
Preheat your oven to 450 degrees.  Line a cookie sheet with aluminum foil and spray generously with cooking spray.  Set aside.  In a large bowl, combine all the ingredients except 1/2 cup of the parmesan, half of the bread crumbs, and the butter or olive oil, until it comes together and is "dry."  If the mixture sticks together then you have the right consistency.  If the mixture is too wet, add more bread crumbs.  


In a shallow dish, mix the rest of the bread crumbs and the parmesan.  With wet hands, form the rice mixture into balls the size of a ping pong ball. 


 Coat with the bread crumb mixture and place on the cookie sheet. 


 Drizzle each ball with a little butter or olive oil, this will help the balls crisp in the oven.   Bake in the preheated oven for 10-15 minutes or until slightly browned.  Broil on high for another 3-5 minutes until well browned - be sure to watch it because they can burn quickly under the broiler!Remove from the oven and allow to cool slightly, about ten minutes before serving.  

To freeze these, bake and broil them as indicated.  Allow to cool completely.  Place on a clean cookie sheet lined with parchment or wax paper.  Place in the freezer for 2-3 hours until fully frozen.  Once frozen, place in Foodsaver bag or Ziplock freezer bags.  To reheat, remove from freezer bag, line on a cookie sheet, and bake for 15-20 minutes at 400 degrees until heated through.  


Enjoy!
Until next time, happy and HEALTHY cooking!


Delicious Baked Pork Chops

Thursday, May 20, 2010


Have you signed up for the web class on May 25th yet?  Click here to sign up!  Space is limited!
Every couple of months I buy a HUGE pork tenderloin and cut it up myself.  I usually get two roasts and about 20 chops out of it.  Pork is a major industry here in Iowa, so the pork here is really good.  I have never been a huge fan of pork but it is really inexpensive and versatile, so I try to make it at least twice a month.  I originally found this recipe on All Recipes but changed it because I didn't have all the ingredients on hand, so the recipe has now morphed into this.  I have made this several times and every time it is a hit! 

Baked Pork Chops
  • 4 thick cut pork chops (I used boneless, skinless pork loin chops but you can use whatever cut you have or like)
  • 2 tbsp. brown sugar
  • 1 tbsp. dijon mustard
  • 1 (6 oz) can tomato paste
  • The same amount of dry white wine as tomato paste (I just use the tomato paste can to measure the white wine).
  • 1 tbsp. herbes de provence
  • 1 tsp. granulated garlic or garlic powder
  • salt and pepper to taste
Preheat the oven to 350 degrees and spray a 13 X 9 inch baking dish (preferrably glass, but if you don't have a glass one that is ok) with cooking spray.  Sprinkle the chops with salt and pepper on both sides and line up in the baking dish. 


 In a bowl mix the rest of the ingredients together and pour over the pork chops. 


Bake in the preheated oven for 45 minutes or until the internal temperature of the pork is 160 degrees. 


I served this dish with brown rice and broccoli for a balanced meal!


The Foodie Mommie Copyright © 2009 Designed by Ipietoon Blogger Template for Bie Blogger Template Vector by DaPino