Showing posts with label leftovers. Show all posts

Chicken Club Pizza

Saturday, September 10, 2011

Hi Everyone!  I have several recipes to be published in the next couple of days, but before I post them, I just wanted to remind everyone that I have an awesome giveaway going on right now!  Click here for details and for your chance to win a Pillsbury Sweet Moments prize pack!  


Now, onto the recipe!  I got this recipe from my friend Shannon who has been making it quite a bit for her family lately.  She says it's a big hit!  This chicken club pizza definitely was a hit in my house!  I made a few changes, like using homemade pizza crust instead of store bought, and I used leftover pesto chicken instead of buying a package of pre-cooked chicken.  Here's the recipe, my modifications are in red.


Chicken Club Pizza


    • 1 can (13.8 oz.) refrigerated pizza crust (I used a homemade crust)
    • 1/4 cup Mayonnaise
    • 1/2 cup  Ranch Dressing 
    • 1 to 1/2 cups shredded cheddar cheese (I used a mix of cheddar and mozzarella)
    • 1 to 1/2 cups finely chopped cooked chicken (I used leftover pesto chicken)
    • 8 slices Bacon, cooked, crumbled
    • 1 to 1/2 cups finely shredded lettuce
    • 1 tomato, finely chopped
      1. HEAT oven to 400ºF.
      2. UNROLL pizza dough on baking sheet sprayed with cooking spray; press into 15x10-inch rectangle. Bake 10 min. I rolled my crust out onto my rectangular baking stone and then baked for 10 minutes.  
      3. MIX mayo and dressing; spread onto crust. Top with half the cheese, chicken, remaining cheese and bacon. I also topped with the tomato at this point too.
      4. BAKE 5 min. or until crust is deep golden brown and cheese is melted. Top with lettuce and tomatoes; I put the tomatoes on in the previous step and baked them with the rest of the toppings.  I topped it with the lettuce after removing it from the oven.  Shannon said she also adds sliced avocado to hers. 

    Until next time, happy and HEALTHY cooking and EATING!

Chili Lime Pork Burritos- Another FABULOUS Chili Lime Recipe

Wednesday, April 06, 2011

Be sure to check out this month's Mother's Day Giveaway and Sale! Going on NOW through April 29th!

I LOVE, LOVE, LOVE the Pampered Chef's new Chili Lime Rub...L O V E!  We are big burrito fans in our house, going to Panchero's at least twice a month.  Back home in Seattle we used to visit Taco Del Mar, or as we called it TACO DEL YUM YUM YUM! LOVE BURRITOS!  So, I decided to marry my love of burritos and my love of the chili lime rub to make Chili Lime Pork Burritos.  Of course, you could do this with chicken too, or beef for that matter.  Fold this the meat up with some black beans, brown rice, salsa, and cheese, serve this up with a dollop of sour cream and you have a really beautiful meal!  The leftovers make a great lunch too!

Chili Lime Pork Burritos


  • 2 large boneless pork loin chops
  • 2 tbsp. + 1 tbsp. Pampered Chef Chili Lime Rub (or equal parts chili powder and lime zest)
  • The juice of one lime
  • 1 large onion, diced
  • 1 large green pepper, diced
  • 1 cup salsa
  • 1 cup chicken stock
  • 2 cups cooked brown rice (I used leftover rice)
  • 1 (15 oz) can black beans
  • 1 cup grated jack and/or cheddar cheese
  • 4 burrito sized flour tortillas
  • sour cream for serving if desired.

Preheat oven to 350 degrees.  In a 13X9 inch baking dish, place the onion and green pepper.  Rub the pork chops on both sides with 2 tbsp. of the chili lime rub.  Place the pork chops over the onions and green pepper.  Mix the lime juice and the chicken stock together and pour over the pork chops, onions and garlic.  Cover baking dish with aluminum foil and 1 and a half hours.  Add the salsa and pull the pork apart using two forks.  Bake another 30 minutes.  In another bowl, add the rice, the black beans, and remaining 1 tbsp. chili lime rub.  Microwave on high 2 minutes or until heated through. Stir.  Place tortillas in aluminum foil and place in the oven for 5 minutes or until warm.  To assemble burritos, spread tortilla with sour cream (if using), sprinkle 1/4 of the cheese,  spoon on some of the beans and some of the meat.  Fold in the sides and roll up!  

These were a BIG hit tonight!

Until next time, happy and HEALTHY cooking and EATING!

Meatloaf with Garden Vegetable Herb Mashed Potatoes

Saturday, January 08, 2011

AWESOME JANUARY PAMPERED CHEF GIVEAWAY AND SALE!! WIN THE FREE PRODUCT VALUE FROM THE SALE (POSSIBILITY OF $15 TO UP TO $250 IN FREE PRODUCTS!) HEAD OVER TO THE FOODIE MOMMIE STORE FOR MORE DETAILS!


I LOVE Meatloaf and am always looking for new ways to improve my recipe!  This meatloaf recipe is a combination of several that I have made my own.  It's REALLY yummy and has a bit of a different spin on it than the traditional meatloaf.  The secret to keeping it moist is soaking the bread crumbs in buttermilk!  I had some garden vegetable cream cheese in the fridge, so I decided to mix it with my mashed potatoes and oh boy were these potatoes a hit!  I also served a vegetable medley of broccoli, cauliflower and carrots!  The perfect family meal for a winter weekend night!  


Meatloaf

  • 2 lbs ground turkey (you could also use lean ground beef)
  • 1 cup seasoned bread crumbs (I make mine from old bread and add minced onion, dill, italian herbs, and granulated garlic and keep them in the freezer for whenever I need them!)
  • 1/2 cup buttermilk
  • 1 cup pureed carrots (or you can use squash or sweet potato)
  • 1 envelope dry onion soup mix (be sure to get one that does not contain MSG or HFCS)
  • 2 cups homemade or store bought tomato based pasta sauce, divided (I used homemade tonight, but normally if I buy it I use Newman's Own)
  • 1/8 cup worcestershire sauce
  • 2 large eggs
  • 1 cup parmesan cheese (if desired)
Preheat oven to 375 degrees.  In a large bowl, soak the breadcrumbs in the buttermilk for 10 minutes.  Add the rest of the ingredients, except the parmesan cheese and only add HALF of the pasta sauce.  Mix well - I mix it with my hands because I find that gives the best results.  Form the meat mixture into a large loaf in a 13X9 baking dish that has been sprayed generously with cooking spray.  Pour the rest of the pasta sauce over the loaf and spread evenly.  Bake 1 hour or until internal temperature of the meatloaf reaches 165 degrees (160 for beef).  You can also check it for doneness by cutting into it and making sure the middle is no longer pink, but this is best avoided if you can.  During the last 10 minutes of cooking, sprinkle with parmesan if using.  Let meatloaf stand approximately 10 minutes before cutting into it and serving.  


Garden Vegetable Herb Mashed Potatoes
  • 6 large russet potatoes, peeled and cut into large cubes
  • enough chicken stock to cover the potatoes in a large stock pot, about 6 cups
  • 6 oz. garden vegetable cream cheese
  • 1 clove garlic, minced
  • 1 tbsp. sour cream
  • 1 tbsp. herbes de provence (or dried thyme)
  • 1/4 cup parmesan cheese (if desired)
Boil the potatoes in the stock until the potatoes are soft.  Drain.  Mash the potatoes with the rest of the ingredients until smooth (if you have a potato ricer this is the best way to do this).  


Meatloaf makes great leftovers!  Be sure to check out some of my ideas for leftover meatloaf by clicking on the leftovers tab in the sidebar!

Slow Cooker "Baked" Potato Soup

Tuesday, October 19, 2010

The Foodie Mommie October Sale ends TOMORROW at 10 pm!  Don't forget- 10% off your entire purchase of Pampered Chef Products! Visit the Foodie Mommie store to take advantage of this great offer!

My Slow Cooker "Baked" Potato Soup is one of Daniel's FAVORITES!  It combines all the flavors of a big baked potato into a soup.  I use shredded potatoes (or you could even use frozen hash-brown potatoes if you wanted) which make this soup thick and hearty as they cook in the crock pot.  This soup has great flavor and the leftovers are even better for lunch the next day!  Unfortunately this soup does not freeze well, but don't worry, it will be gone as quickly as you make it, so you don't need to worry about saving it!

Slow Cooker "Baked" Potato Soup

  • 4 cups shredded potatoes (about 4 large baking potatoes, but you can use whatever potatoes you have on hand- or to make it easier you can use a frozen package of hash brown potatoes.  To shred the potatoes I use my food processor with the cheese grater attachment, you can also just use a cheese grater or a micro plane).
  • 4 cups chicken stock or broth
  • 1 large onion, chopped
  • 4 cloves garlic, minced (I like to use my garlic press for this - also from PC)
  • 1 stalk celery, finely chopped (I like to use my PC food chopper for this, it makes finely chopping easier)
  • 6 slices turkey bacon (or regular bacon), cooked and crumbled
  • 1 cup milk
  • 1/4 cup flour (I like to use Wondra but you can use all purpose)
  • 1/2 cup sour cream
  • 1 cup grated cheddar cheese (plus more for serving if desired)
  • 1 cup frozen peas (Daniel likes peas but if you don't then leave them out).
Place potatoes, onions, celery, garlic, and chicken stock in the crock of your slow cooker.  Set to cook for 8 hours on low.  After 8 hours, whisk the milk and the flour together until the flour is dissolved in the milk.  Add the milk mixture, the bacon, and the peas to the slow cooker and stir to combine.  Set slow cooker to high and cook for another 30 minutes.  Add the sour cream and the cheese, and stir well until mixed in.  Serve with a dollop of sour cream, a sprinkling of cheese, and your favorite crackers if desired.


Happy and HEALTHY cooking and EATING!


Super Easy Oven Chicken Chimichangas

Tuesday, October 12, 2010

I have posted a couple of chimichanga recipes already, and here is another!  I love oven chimichangas because they are quick, easy, and budget friendly at less than $1 per serving!  I like to make these when we have had a busy day and I need something sans stress for dinner!


Super Easy Oven Chimichangas

  • 2 cups cooked roasted chicken (I use a leftover roasted chicken or get a rotisserie chicken from the grocery store deli)
  • 1 cup salsa
  • 1 (14.5 oz) can pinto beans
  • 1 (6 oz.) can diced green chilies
  • 2 cups shredded cheddar or jack cheese or a blend of the two
  • 8 large flour tortillas
  • 3 tbsp. olive oil
Preheat oven to 400 degrees.  Spray a large cookie sheet or bar pan with cooking spray (I use my Pampered Chef bar pan stoneware). In a medium bowl, mix the chicken, salsa, green chilies and pinto beans. Place tortillas  between to damp paper towels and microwave for 1 minute.  Place about 1/8 cup of cheese in the middle of each tortilla, then place about a 1/4 cup of the chicken mixture.  Fold in sides of the tortilla and roll up.  Place on the cookie sheet.  Brush with olive oil (this will help them crisp in the oven).  Bake for 10-15 minutes or until the chimichangas are golden brown and heated through.  Serve with a dollop of sour cream!


Until next time, happy and HEALTHY cooking and EATING!

Good Old Chicken Noodle Soup

Wednesday, September 29, 2010

I LOVE homemade chicken noodle soup.  I make a big pot of it a couple of times a year just to have in case anyone is sick.  Tonight I made this delicious soup to use up the rest of the chicken I roasted yesterday for the Chicken Divan Mac and Cheese recipe.  You definitely cannot go wrong with this recipe!


Good Old Chicken Noodle Soup


1 recipe chicken stock
3 cups cooked chicken (I use the meat from the chicken I used to make the stock)
2 cups carrots, chopped
2 celery stalks, chopped
1 onion, chopped
1 cup chopped leafy greens (like escarole, chard, kale, spinach, or a mixture)
1 (14.5 oz) can great northern beans, drained
2 cups egg noodles (if I don't make my own, I usually use Reams frozen egg noodles, but you can use whatever egg noodles you like)


In  a large soup pot, heat the stock over high heat until boiling. Turn heat down to medium high. Add all of the ingredients except for the leafy greens and the egg noodles and bring back to a boil.  Once boiling, turn heat down to low and allow to simmer for at least one hour and no more than 3 hours.  Add the noodles and the leafy greens and continue to simmer until noodles are cooked through (usually about 20 minutes for the homemade or frozen noodles and about half that for the packaged ones).  I like to garnish this soup with fishy crackers and serve it with some hot bread.  YUMMY!


Until next time, happy and HEALTHY cooking and EATING!

Italian Chicken Buddies

Wednesday, September 08, 2010

This is just a quick post to share something I did with last night's leftovers for lunch today.  I took the leftover chicken patties and heated them in a 350 degree oven for about 5-10 minutes.  Then I topped them with some provolone cheese and heated just until melted.  I served it on a bun topped with some of my tomato sauce (you can use store bought too).  Yummy!


Beef (or ground turkey) and Bean Chimichangas

Tuesday, August 03, 2010

HAPPY BIRTHDAY TO MY LITTLE BOONIE.  I CAN'T BELIEVE MY BABY IS 2 TODAY! 
Where does the time go?

So, today is Boonie's birthday.  I finished the ice cream cake and I have to say that it turned out pretty well, despite the fact that it is blatantly obvious that I have no future in cake decorating!  I am not posting the recipe because it violates pretty much every single one of my food rules (even though rules do not apply on birthdays, and anything goes), but here is a picture.  If you want to know how I made it, e-mail me and I will tell you.  It was actually quite easy, but at the same time very time consuming.  The middle is mint chip ice cream and crumbled oreo cookies. Yum!

Tonight I am presenting another chimichanga recipe.  This is super easy and really quite yummy!  It's also quick.


Beef (or ground turkey) and Bean Chimichangas
  • 1 lb ground beef or ground turkey (which is what I use)
  • 1 medium onion, chopped
  • 1 medium green pepper, chopped
  • 4 garlic cloves, minced
  • 1 can diced green chilies
  • 1 can refried black beans
  • 1 sweet potato, mashed
  • 1/2 cup salsa
  • 1 tsp. cumin
  • 1/2 tsp chili powder
  • 1/2 tsp. paprika
  • 2 cups shredded cheddar or jack cheese or a combo of the two
  • 3 tbsp. olive oil divided
  • 8 large flour tortillas
Preheat oven to 400 degrees. Spray a cookie sheet generously with cooking spray and set aside.  In a large, deep skillet over medium high heat, cook the onions and green peppers in half of the olive oil for about 5 minutes or until soft.  Add the garlic and the ground turkey and saute until ground turkey is cooked through another 3-5 minutes.  Add the rest of the ingredients except the other half of the olive oil and the tortillas, and cook about 3 more minutes until heated through.  Remove mixture from the heat.  Take each tortilla and place a small amount of cheese in the middle, then top with the meat mixture.  Fold sides in and roll up.  Place on the cookie sheet.  Brush the chimichangas with olive oil.  Bake in the oven for 5-10 minutes until crispy.  Serve with a dollop of sour cream, more salsa, sliced tomatoes, guacamole, or your favorite topping!

Until next time, happy and HEALTHY cooking and EATING!

CBLT Wraps

Sunday, July 25, 2010

Be sure to enter the Eating for Beginners Giveaway.  Ends at midnight on August 1st!  Also, check out Challenge Post #2 for a chance to win 10 entries in the EFB Giveaway and a featured spot on my blog!


You will have to forgive me again for the lag time in posting.  This was last night's recipe. We are having such a hard time kicking this bug that is going around our house.  First David and Daniel had it, then Daniel got Impetigo, then I got whatever David had, and this is day two of that, so I feel pretty yucky.  I didn't even cook tonight.  Welcome to all my new followers, I promise to get around to visiting your blogs soon enough.  I also won an award that I need to post!  Being sick really isn't any fun!  Anyway...enough carrying on about that!  Onto tonight's recipe:

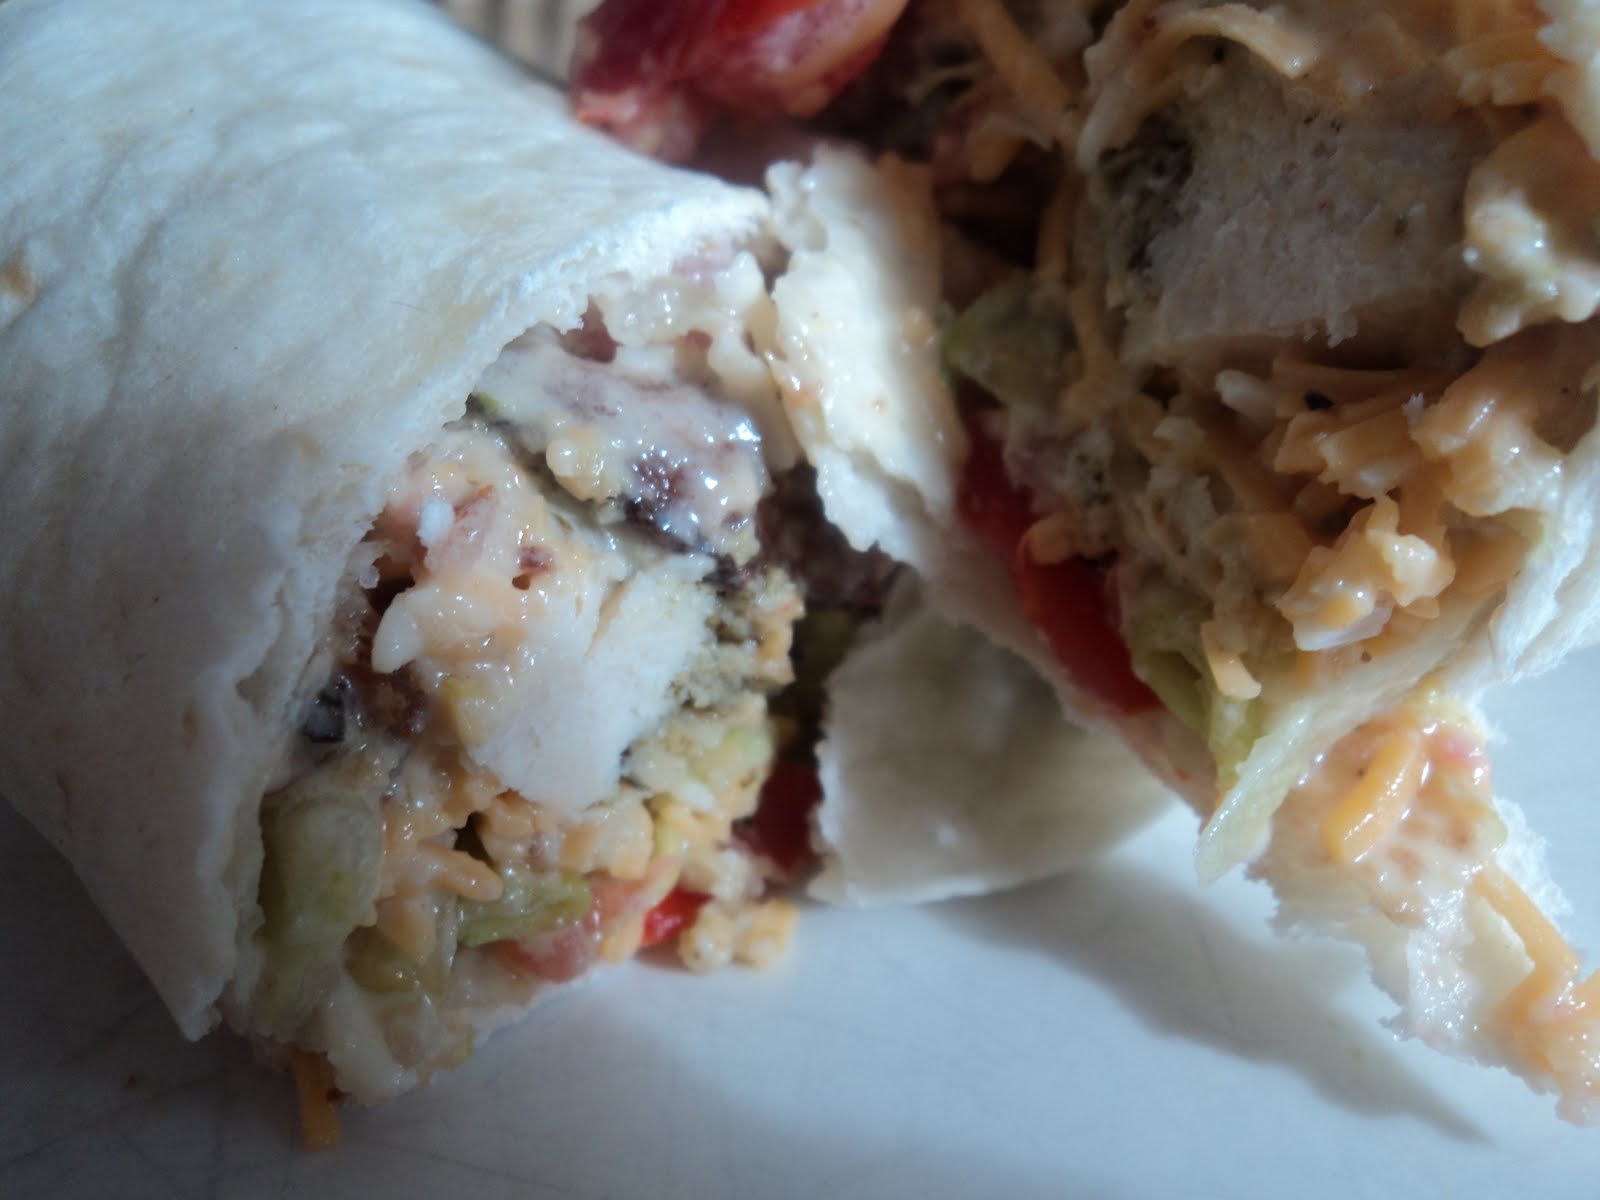
Here is a super easy recipe that takes about 5 minutes (and I mean 5 minutes literally) to whip together.  I make this with leftover chicken (last night I used the leftover Baked Crunch Pesto Chicken but you could use any leftover cooked chicken, or even a rotisserie chicken from the grocery store would work just fine)!  These are great for a quick dinner, picnics, or I sometimes take them along when we are traveling for an easy lunch!

CBLT (chicken, bacon, lettuce, tomato) Wraps 

  • 1 cup cooked chicken, diced
  • 1 tomato, diced
  • 1 cup shredded lettuce
  • 6 slices bacon, cooked and crumbled
  • 1/2 cup shredded cheddar cheese
  • 3 tbsp. mayonnaise (I used homemade cooked egg mayo, but you could use store bought)
  • 6 large flour tortillas
In a medium bowl, mix all of the ingredients together except for the tortillas.  Heat the tortillas in the microwave by placing them between two damp paper towels and heating for 30 seconds.  Place 1/3 cup of filling into the middle of the tortilla, fold sides of tortilla, and roll up to secure.  Enjoy!

Until next time, happy and HEALTHY cooking and EATING!


Baked Crunchy Pesto Chicken

Thursday, July 22, 2010


This has to be one of the easiest and most delicious chicken recipes ever.  I make this ALL THE TIME not only because it is so yummy, and so easy, but it is also really economical!  The prep is virtually hands off and it is a very good "make once, eat twice" recipe.  I usually cut up leftovers and use them in sandwiches, salads, pasta dishes, and more.  On Saturday, I will be using the leftovers in my Chicken, Bacon, Lettuce, and Tomato Wrap (CBLT).  This is a total favorite in my family.


Baked Crunchy Pesto Chicken
  • 6 boneless, skinless chicken breasts, pounded thin (about 1/4 inch)
  • 1 cup homemade or store bought basil pesto (you may not need all of the pesto)
  • 2 cups bread crumbs seasoned with italian herbs
  • 1/2 cup parmesan cheese, grated
  • 1/2 cup mozzarella cheese (or italian cheese blend), grated

Preheat oven to 350 degrees.  Spray a 13X9 baking dish generously with cooking spray.  Mix the bread crumbs and the cheese in a shallow bowl or dish, place some of the pesto in another shallow dish (I use a pie plate or pasta bowls- you can add more pesto if you need it).  Coat each chicken breast in the pesto, then the bread crumb mixture, then place in the baking dish.  Bake for 45 minutes to 1 hour or until the chicken is fully cooked (no longer pink in the thickest part of the breast).

I usually serve this with some pasta coated in the remaining pesto and a steamed vegetable, tonight it was carrots.  You can also serve this with rice, or with a nice tossed salad.  You can change up the flavors by using a nice tapenade or a different type of pesto to substitute for the basil pesto.  


On another note, I did not receive any entries for this weeks Fit Family Challenge so I am extending it for another week.  If you would like to be featured for a week on my blog please visit the Fit Family Challenge Page to enter a post in the challenge!  I look forward to hearing your great ideas!  
Until next time, happy and HEALTHY cooking and EATING!

A Great Use for Leftover Meatloaf- Makeshift Pasta Bolognese

Thursday, July 15, 2010

Have you signed up for the 30 Day Fit Family Challenge?  If not, head over to the challenge page and linky up!  You can join us even if you don't have a blog!  Win a chance weekly to have your post featured on my blog! Let's make our families healthier together!

Last night I posted my meatloaf recipe, and tonight I am posting a great recipe using the leftover meatloaf.  Meatloaf is really yummy, when it is made well, but it usually makes a lot of food and the leftovers can be tiring to eat sometimes.  Of course, meatloaf sandwiches are really quite good but they can get boring after awhile.  This recipe turns your meatloaf into a sort of makeshift Bolognese Sauce that you can serve over pasta!  And oh boy is it good!

Makeshift Bolognese Sauce over Pasta (using leftover meatloaf)
  • 1/3 to 1/2 of a leftover meatloaf
  • 1 can (15 oz) crushed tomatoes (or you can do what I do, take a can of diced tomatoes and puree it using the immersion blender)
  • 1 tbsp. sugar
  • 1 tbsp. granulated garlic
  • 1 tbsp. dried italian herbs 
  • 1 (16 oz) pkg. pasta - any kind you like
  • 1 tbsp. olive oil
Cook pasta according to package directions, drain and set aside.  While pasta is cooking, in a large skillet with deep sides add the olive oil and heat over medium high heat.  Add the rest of the ingredients, breaking up the meatloaf to mix it with the tomatoes.  Keep stirring until heated through and the consistency of chunky meat sauce.  Serve over pasta with a sprinkling of parmesan and fresh basil if desired.  

This is a great throw together meal for a busy night.  Sometimes you can get meatloaves at the grocery store by where you would find the rotisserie chickens. You can use that if you don't have a leftover meatloaf at home.  

Until next time, happy and HEALTHY cooking and EATING!

Ooh...Sockeye!

Monday, July 05, 2010

I am really excited tonight because I FINALLY managed to find some quality Sockeye here in the Midwest.  I think Sockeye is one of the things I  miss most about Northwest summers.  Salmon is so important in the Northwest that the Sockeye season commences every year with a Salmon Days festival.  Oh how I miss Sockeye.  Oh how I miss eating salmon that is red and not light pink or white.  Oh how I miss walking outside and peering down into a creek and seeing hundreds of thousands of salmon spawning.  Oh how I miss salmon.  But I digress, I was at Sam's Club of all places and they had a special fish guy there (who knew!) who told me that the Sockeye was shipped fresh every Friday from Seattle.  Oh how excited that made me!  Even more exciting was that this past weekend it was only $8.99 a pound!  Oh yes, I had to buy some.  I was a little skeptical, especially after my Sockeye incident from last week, but it didn't have any odor and it seemed fresh, so that was encouraging.  So tonight I prepared the Sockeye, and oh boy was it yummy!  I have to tell you, I am a salmon snob, and even though it wasn't as good as if I had purchased it at Pike Place in downtown Seattle, it was still very worth it! Back home there are two ways I would prepare the Sockeye, the first is with lemon juice, rock salt, and brown sugar.  Marinate that overnight, remove the rock salt, and grill (this is the best way).  The second way would be very simply with lemon juice, garlic and dill, and the Cedar Plank it on the grill.  Tonight, I made a soy ginger glaze and I served this up with a nice rice pilaf and some broccoli that came from Abbe Hills Farm.  What a beautiful summer meal!


Tonight's Sockeye with a Soy Ginger Glaze

 
This is the color salmon should be!  RED!  BEAUTIFUL!
  • 1-2 lbs fresh Sockeye fillets
  • 2 scallions, chopped
  • 1 tbsp. fresh ginger root, micro-planed
  • 1/4 cup soy sauce or Tamari
  • 1/4 cup olive oil
  • 1/2 tsp. granulated garlic
  • 1/8 cup packed brown sugar
  • 1/2 stick of butter, cut into cubes
Preheat oven to 350 degrees.  Line a cookie sheet with aluminum foil and spray generously with cooking spray.  Place the salmon on the foil.  In a bowl, whisk all of the ingredients together and pour over the salmon.  Place butter cubes over the top of the salmon.  Fold the foil into a little packet to tent the salmon.  


Bake for 15-20 minutes until the salmon flakes when a fork is inserted into the middle.  Enjoy!
The leftover fish is quite delicious served cold the next day on a salad, with crackers, or just by itself!


Until next time, happy and HEALTHY cooking and EATING!


The Famous Cabbage Chicken Salad

Sunday, July 04, 2010

Happy 4th of July to all my American readers out there!  To celebrate, I bring you the absolute most delicious salad in the entire universe!  For as long as I can remember, this salad has been made in my family.  In fact, I don't remember a summer where this wasn't made at least 10 times.  I am sure there are many variations on it out there, but I am not sure where the recipe originated.  This was my father's favorite summer salad, and when I first made it for my husband seven years ago, he was skeptical.  You have to understand that when I met David, he was somewhat of a picky eater.  He pretty much lived on fast food and anything he could dump out of a box before he met me.  Oh how that has changed!  Anyway, he was skeptical, "cabbage? Yuck!"  It didn't take much after he tried it though for the Cabbage Chicken Salad to become his summer favorite as well!  This recipe makes A TON of salad, but trust me it won't last long.  Also this is one that tastes even better the next day, and by day three it is the best it could ever be!  Plus, this recipe is super easy, so that is a bonus!  We call this The Famous Cabbage Chicken Salad in our family because whenever it is made, it disappears, and people always request it for picnics, potlucks, and such.


The Famous Cabbage Chicken Salad

  • 1 large or 2 small heads green cabbage, washed and chopped
  • 2 packages crunchy Chinese noodles broken up(like Top Ramen, however I do not use Top Ramen because of all the horrible ingredients from which it is made.  I have found another brand, although I cannot recall it off the top of my head that has only three ingredients.  You can use Ramen, that is what was always used when I was a kid.  Just look around the Ramen noodles, there are other choices and pick what you like).  Discard the seasoning packet.
  • 1 cup slivered almonds
  • 3 tbsp. sesame seeds
  • 2 lbs boneless skinless chicken breasts
  • 1/4 cup rice wine vinegar
  • 1/4 cup cider vinegar
  • 1/4 cup oil (I use olive oil or vegetable oil)
  • 2 tbsp. hot and sweet mustard
  • 1 tbsp. sugar
  • 1/2 tsp. sesame oil
Place chicken in a large saucepan and fill with water or chicken stock just to cover the chicken.  Poach the chicken for about 15-20 minutes over medium heat until it is cooked through.  Remove the chicken from the poaching liquid and chop or shred.  Place in the refrigerator to cool.  Heat your oven to 400 degrees and spray a cookie sheet generously with cooking spray.  Spread out the noodles, the almonds, and the sesame seeds.  Cook in the oven for about 5 minutes or until browned and toasted.  Remove from oven and let stand to cool.  Place the cabbage in a VERY LARGE bowl (I am not kidding, VERY LARGE).  Add the cooled chicken and crunchies to the cabbage.  In a smaller bowl, mix together the vinegars, the mustard and the sugar, whisk vigorously while streaming in the oils.  Pour over the salad and mix well until combined.  This is SOOOOO good.  If desired, serve with hot and crusty bread.  Yummmy!


And just because he is so darned cute, here is a picture of my little man getting ready to go on a bike ride!


Photobucket

Tomato Tart

Saturday, July 03, 2010

This is a recipe that I absolutely love to make in the summer because it reminds me of such wonderful summer memories.  I first made this tart a couple of years ago when I was in Paris for the summer.  Pauline had gone to the Dominican Republic for vacation, so I had the house to myself.  On the night before I was to leave and come back home, Pauline returned from her vacation.  I figured she would be hungry and tired after a long flight, so I made her dinner.  I had a lot of things to use up before I left France, so I threw together this tomato tart and boy was it a winner!  It is SO easy and takes very little effort.  I usually serve it up with a tossed green salad for a lovely and light summer meal.  


Tomato Tart

  • 1/2 package phyllo dough (I will sometimes use puff pastry, but phyllo dough is a little leaner on the waistline)
  • 1 small (15 oz) tub ricotta cheese (or 15 oz of homemade ricotta)
  • 2 cups swiss cheese (or emmenthal, or gruyere, or comte), shredded and divided
  • 1/2 cup parmesan cheese (of course I recommend Parmiggiano Reggiano), divided
  • 1 tbsp. herbes de provence
  • 2 large eggs
  • 1 tbsp. fresh basil, chopped
  • 2 roma tomatoes or vine tomatoes, sliced thinly
  • 1/2 stick butter, melted or 1/4 cup olive oil (you probably won't need all of this- I used olive oil tonight)
  • salt and pepper
Preheat oven to 350 degrees.  Spray a 13X9 inch baking dish generously with cooking spray.  Take the phyllo dough out of the package and carefully lay it out flat.  Place the first layer in the baking dish.  Carefully brush (using a pastry brush) the layer of phyllo with butter or olive oil, then carefully place the second layer on top.  Repeat until all of the layers have been added and brushed with butter or oil.  Set aside.  It is ok if the phyllo tears a little.  


  In a medium bowl, mix the ricotta, eggs, 1 cup of the swiss, 1/4 cup of the parmesan, herbes de provence, salt and pepper.  Pour the mixture into the baking dish on top of the phyllo and spread evenly.  Place tomatoes on top of the ricotta mixture.  


Sprinkle on the basil and top with the cheese.  


Add a sprinkling of extra herbes de provence if desired.  Serve warm or cold.  Tastes great cold the next day for lunch!


Bake for 35-40 minutes or until the pastry is and top of tart are golden brown.


Until next time, happy and HEALTHY cooking and EATING!


The Foodie Mommie Copyright © 2009 Designed by Ipietoon Blogger Template for Bie Blogger Template Vector by DaPino