Showing posts with label appetizers. Show all posts

Chili Lime Chicken Nachos

Friday, March 25, 2011

David and I LOVE nachos.  I guess my love of nachos comes from when I was a kid.  My parents used to make these fantastic nachos piled high with cheese, guacamole, sour cream, and salsa.  Even though I don't make my nachos the way they did, I still have fond memories of nacho night when I was a kid.  I have been making these nachos quite a lot lately for Pampered Chef parties, neighborhood get togethers, and this week, I made them for dinner.  They are SO yummy and SO POPULAR!


Chili Lime Nachos


  • 2 cups cooked chicken (I either buy the cooked chicken strips in the package or I use leftover roasted chicken.  You could also get a deli rotisserie chicken and use that)
  • 2 cups grated cheddar and jack cheeses
  • 1/2 of a large red pepper, finely diced
  • 2 tbsp. + 1 tbsp. Pampered Chef Chili Lime Rub or equal parts chili powder and lime zest
  • juice of one lime
  • 8 oz. sour cream
  • 1 large bag tortilla chips (I usually make nachos with blue corn chips but I like to use yellow corn chips for this recipe)
Preheat oven to 400 degrees.  In a medium sized bowl, stir together the cooked chicken, the red pepper, and the 2 tbsp. chili lime rub (or the chili powder and lime zest).  Place one layer of chips on a large bar pan or sheet pan (I like to use my large bar stone for nachos, I find that the stone makes the chips very crispy), then layer with half of the chicken mixture, and half of the cheese.  Place another layer of chips, then the other half of the chicken mixture, and the other half of the cheese.  Bake in the oven for 5-10 minutes or until cheese is melted and bubbly.  Meanwhile, while nachos are cooking, mix together the sour cream, the lime juice, and the rest of the chili lime rub until smooth and creamy.  When the nachos are done, serve with the chili lime sour cream.  Sometimes I like to be fancy so I put the sour cream in my Easy Accent Decorator and pipe it directly onto the nachos.  

Enjoy!  Until next time, happy and HEALTHY cooking and EATING!

Pull Apart Pizza

Wednesday, October 27, 2010

Be sure to head over to The Foodie Mommie Store to take advantage of the November Pampered Chef Sale!  Order by November 15th and get 10% off!

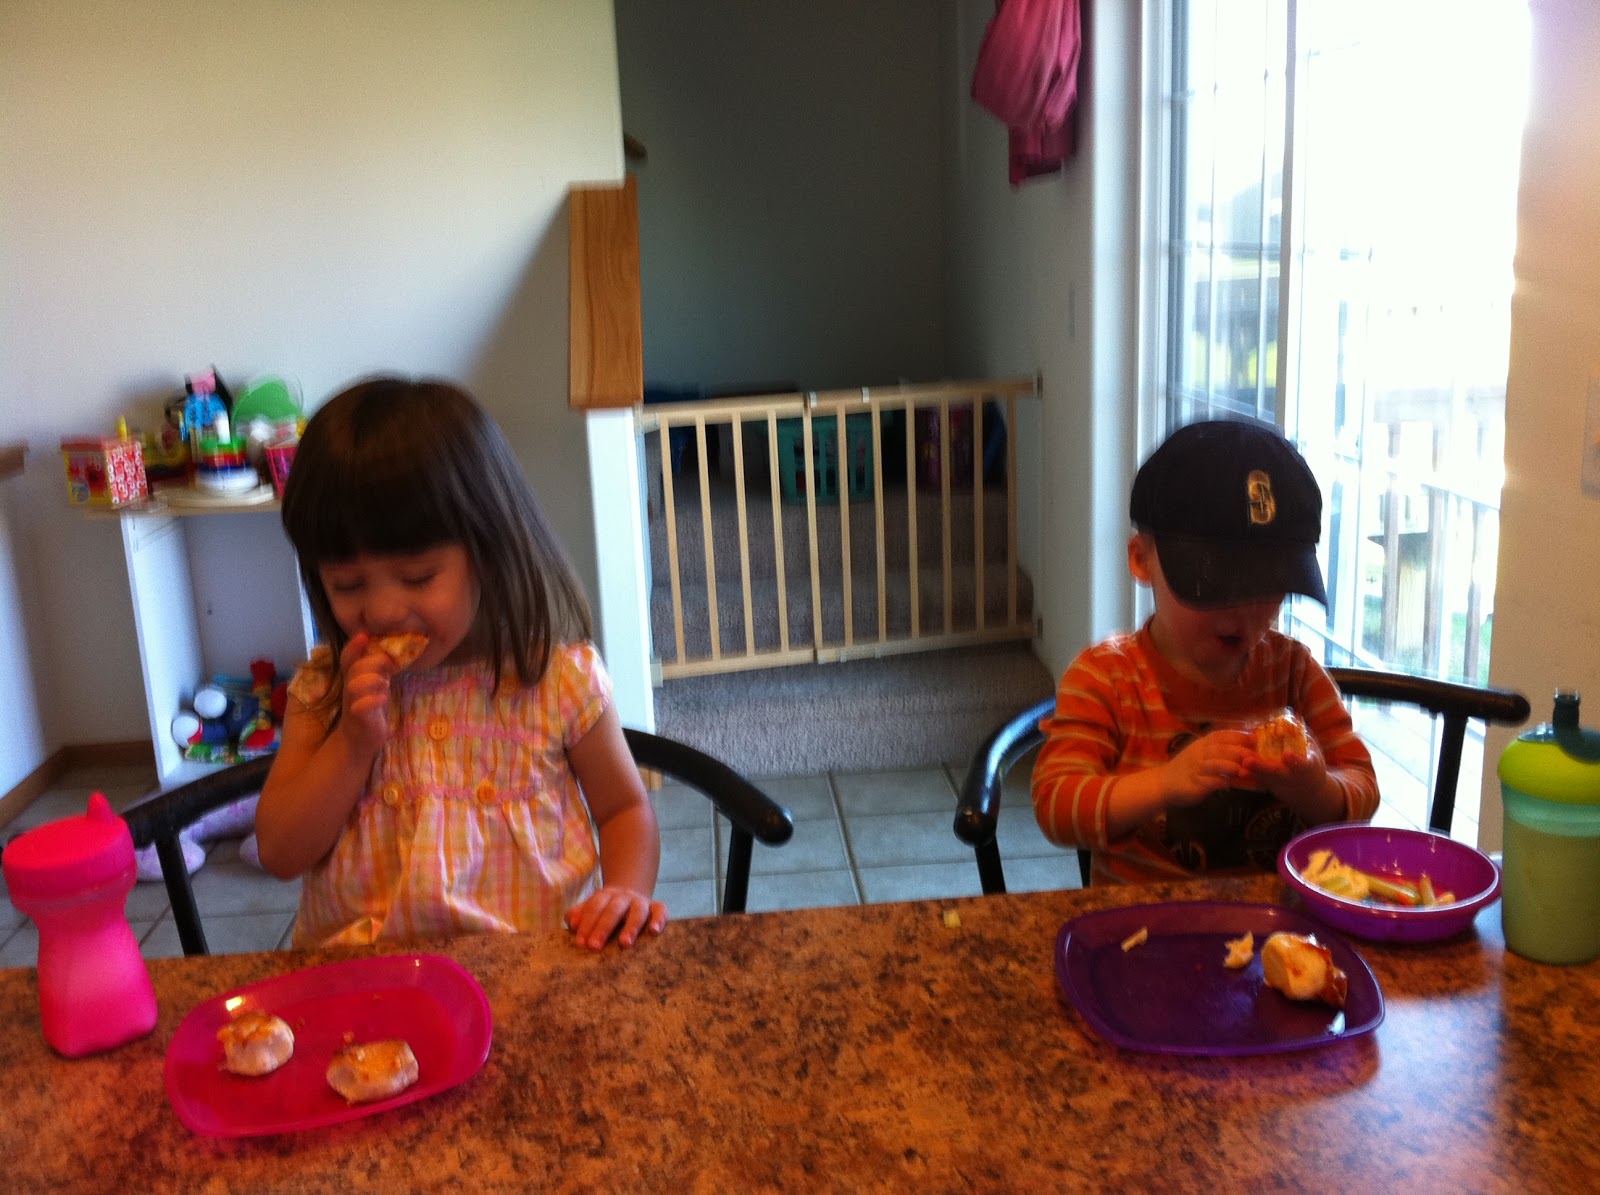
My friend and neighbor Julie (mother of Daniel's bff Aubrey) is hosting a Pampered Chef party next Sunday afternoon.  Last week we were going over some of the recipes she was interested in having demoed for her cooking show, and we came across this one.  Today we got together for lunch at Julie's house and decided to give it a trial run (by the way, Julie's house is EXACTLY the same as mine, EXACTLY- just in case you were noticing from the picures)!  Let me tell you, what a hit with the kids!  Of course, we made it a little differently than the recipe that the Pampered Chef offers, but the idea is the same and it is SO easy!  Give it a try!

Pull Apart Pizza
  • 2 tubes refrigerated bread dough (like Pillsbury, I typically don't like Pillsbury but they are redeeming themselves by changing the ingredients in their products and offering more natural choices)
  • 2 cups shredded cheese of your choice (Julie and I used a mix of mozzarella, parmesan, and cheddar and then because I had some leftover from last night, we topped the pizza with a few fresh small mozzarella balls)
  • approx. 3/4 cup pizza sauce
  • your favorite pizza toppings (we used pepperoni)
  • 1 tbsp. olive oil
Preheat oven to 400 degrees.  Spray a large pizza stone generously with cooking spray or olive oil.  Cut each loaf of dough in half lengthwise about 3/4 of the way through.  Then cut each loaf crosswise creating 32 half moons (16 from each loaf).  Arrange on the stone so that they are just touching, leaving a 1/2 inch border around the outside.  Brush lightly with olive oil and bake 14-16 minutes or until crust is golden brown.  Top the "crust" with pizza sauce, cheese, and your favorite toppings.  Bake another 5 minutes or so until cheese is melted and bubbly!

The kids love this because they were able to pull pieces off, and the pieces were just the right size for them!


Until next time, happy and HEALTHY cooking and EATING!

My Moms Club Farmers Market

Saturday, October 09, 2010

On Thursday Moms Club of Marion had a Craft Show/Farmers Market to promote all of the "mompreneurs" in our group!  We are a group of approximately 50 members, most of us stay at home moms and a few stay at home dads!  This was a lot of fun!  I set up a table for The Foodie Mommie/The Pampered Chef and featured a few recipes!  
The Foodie Mommie Table at the
Moms of Marion Farmers Market/Craft Show


 I made three recipes for sampling at my table.  The first was the mini deep dish pizzas featured earlier this week on The Foodie Mommie.  The second was pumpkin shaped squash sugar cookies. This recipe came from adding 1 cup of pureed squash and 1 extra cup of flour to the Camp Huston Sugar Cookies.  Then when I rolled them out I used a pumpkin shaped cookie cutter to cut the cookies out and sprinkled them with a little orange sugar on top! They were a big hit!


The third recipe was a Sun dried Tomato and Pesto Torta.  This also was a HUGE hit.  I served it with homemade italian herb canapes.  Yum!


Sun Dried Tomato and Pesto Torta

  • 8 oz. cream cheese, softened
  • 1/4 cup oil packed julienne cut sun dried tomatoes
  • 1/4 cup pesto sauce (I used homemade but you can use any kind you like)
  • 2 tbsp. toasted pine nuts
  • 2 tbsp. balsamic vinaigrette (homemade or store bought - I recommend Newman's Own if you are going to use a store bought dressing)
Daniel and his friend Christopher enjoying
one of the squash sugar cookies (and some dried cherries)
Spray a small bowl or dish with cooking spray.  Line with plastic wrap and spray the plastic wrap.  Spread half of the cream cheese, covering the bottom and sides of the bowl or dish.  Spread the pesto on top of this.  Spread with the remaining cream cheese (it is ok if the pesto seeps through as this will be the bottom of your torta).  Cover with plastic wrap and place in the refrigerator a minimum of two hours and up to 8 hours (I usually prep the day before and place in fridge overnight).  When you are ready to serve, remove the plastic wrap from the dish, remove cream cheese mixture from the dish and unwrap the plastic wrap.  Place the cream cheese upside down on your serving dish so that the bottom is now the top.  Place the sun dried tomatoes over the top of the torta, then sprinkle with pine nuts and drizzle with vinaigrette.  Serve with crackers or canapes (canapes are small slices of bread).  

Until next time, happy and HEALTHY cooking and EATING!


Mini Deep Dish Pizzas

Thursday, October 07, 2010

It was meant to be.  Yesterday my mom called me to tell me about a fun recipe idea she had for Daniel.  Today I am setting up a table at my Moms Club Fall Bazaar and I needed some easy snack/appetizer type foods to share.  When my mom called with this idea, it was like fate!  She was meant to come up with this recipe idea, and I was meant to try it out!  Let me tell you what an awesome idea it was!  Mini Deep Dish Pizzas.  I even ALREADY HAD all the ingredients AND I got to use one of my nifty Pampered Chef gadgets!  I made these in mini muffin tins, but if you want them a little bigger you can use regular sized muffin tins.  So anyway, enough rambling, here is a SUPER EASY recipe that you can make with your kids!


Mini Deep Dish Pizzas

  • 1 recipe pizza crust (or any pizza crust you like- or you could use refrigerated crescent rolls or refrigerated biscuits - I have discovered Simply Pillsbury and they are GREAT because there is nothing yucky in them.)
  • 2 cups shredded mozzarella cheese (or any shredded cheese you like)
  • Your choice of pizza toppings - I made 24 pesto and cheese and 24 tomato and cheese, but you could cut up pepperoni, ham, veggies, anything you like.
Preheat oven to 375 degrees.  Generously grease two mini muffin tins (or regular muffin tins).  Roll about a teaspoonful of pizza dough (for reg. size do a tbsp.) into a ball and place into each muffin cup.  I used my Pampered Chef Mini Tart Shaper to press the dough into the tins to create a "pizza cup" but you can also use your fingers to line the tins with the dough.  Fill each cup with your preferred pizza sauce and toppings, top with cheese.  Bake for 15 minutes or until cheese is melted and crust is slightly puffed and golden.  

Daniel LOVED making these.  His favorite part was using the tart shaper to press the dough out into the muffin tins.  He also LOVED sprinkling the cheese on top of each "pizza."  


Anyway, I hope you all enjoy your day!  Until next time, happy and HEALTHY cooking and EATING!

The Foodie Mommie Copyright © 2009 Designed by Ipietoon Blogger Template for Bie Blogger Template Vector by DaPino