Showing posts with label snacks. Show all posts

The Best Popcorn EVER!!!

Friday, November 12, 2010

I LOVE popcorn!  But I am very particular.  I won't eat movie popcorn, for example, and I will rarely eat the microwave variety.  Popcorn can be a very healthy treat, if  you air pop it and don't add much butter.  I like to experiment with different flavors of popcorn, cheesy popcorn, garlic popcorn, chocolate caramel corn, etc.  A couple of weeks ago I was asked to do a Pampered Chef party for my friend.  I made this popcorn and it was an instant hit.  The idea came to me because I was craving popcorn while I was trying to brainstorm some ideas of easy snack foods for entertaining for the holidays.  I made this for another Pampered Chef show last night and again, it was a total hit!  The secret ingredient?  The Pampered Chef Oil Dipping seasonings, but you could use any type of seasoning you have on hand.  Pampered Chef has four varieties - sundried tomato, parmesan garlic, lemon herb, and spinach and red pepper.  They cost $6.50 and they all work really great for this popcorn.  If you are craving some popcorn tonight and don't want to wait, you can use any variety of salt free mixed herbs and spices.  No need for salt here, the flavor of this popcorn is FANTASTIC!  This recipe couldn't be easier!


The Best Popcorn EVER!
Note- the instructions for this recipe are for popping the popcorn on the stove.  You can also air pop your popcorn, just omit the instructions for cooking the popcorn.

  • 1/2 cup un-popped popcorn kernels
  • 4 tbsp. butter 
  • 1 tbsp. Pampered Chef oil dipping seasoning of your choice or other salt free seasoning mix
  • 1 tbsp. parmesan cheese 
  • 1 tbsp. vegetable oil
In a medium sized saucepan with a lid, heat the oil over medium heat.  Add two or three popcorn kernels and cover.  When those kernels have popped, add the rest of the popcorn and cover.  Allow popcorn to pop, shaking the pan back and forth to prevent burning until the popping slows to about 15 seconds between pops and a majority of the popcorn is popped.  Remove the popcorn to a very large bowl.  Place the butter and seasoning in a microwaveable bowl.  MIcrowave on high for 30 seconds or until melted.  Add the parmesan cheese, stir to make sure it is well combined.  Pour over the popcorn and use your hands (or a large spoon) to mix until the popcorn is well coated with the butter mixture.  Enjoy!

Until next time, happy and HEALTHY cooking and EATING!

Mini Deep Dish Pizzas

Thursday, October 07, 2010

It was meant to be.  Yesterday my mom called me to tell me about a fun recipe idea she had for Daniel.  Today I am setting up a table at my Moms Club Fall Bazaar and I needed some easy snack/appetizer type foods to share.  When my mom called with this idea, it was like fate!  She was meant to come up with this recipe idea, and I was meant to try it out!  Let me tell you what an awesome idea it was!  Mini Deep Dish Pizzas.  I even ALREADY HAD all the ingredients AND I got to use one of my nifty Pampered Chef gadgets!  I made these in mini muffin tins, but if you want them a little bigger you can use regular sized muffin tins.  So anyway, enough rambling, here is a SUPER EASY recipe that you can make with your kids!


Mini Deep Dish Pizzas

  • 1 recipe pizza crust (or any pizza crust you like- or you could use refrigerated crescent rolls or refrigerated biscuits - I have discovered Simply Pillsbury and they are GREAT because there is nothing yucky in them.)
  • 2 cups shredded mozzarella cheese (or any shredded cheese you like)
  • Your choice of pizza toppings - I made 24 pesto and cheese and 24 tomato and cheese, but you could cut up pepperoni, ham, veggies, anything you like.
Preheat oven to 375 degrees.  Generously grease two mini muffin tins (or regular muffin tins).  Roll about a teaspoonful of pizza dough (for reg. size do a tbsp.) into a ball and place into each muffin cup.  I used my Pampered Chef Mini Tart Shaper to press the dough into the tins to create a "pizza cup" but you can also use your fingers to line the tins with the dough.  Fill each cup with your preferred pizza sauce and toppings, top with cheese.  Bake for 15 minutes or until cheese is melted and crust is slightly puffed and golden.  

Daniel LOVED making these.  His favorite part was using the tart shaper to press the dough out into the muffin tins.  He also LOVED sprinkling the cheese on top of each "pizza."  


Anyway, I hope you all enjoy your day!  Until next time, happy and HEALTHY cooking and EATING!


Apple Orchard Fun Day

Friday, September 10, 2010

Today we had absolutely GORGEOUS fall weather.  Whenever the weather is nice, I like to take Daniel to do things outside.  We have an apple orchard called Allen's Orchard about 5 minutes from our house.  Today my friend and neighbor Julie and I took Daniel and her two daughters Aubrey and Addison to pick apples.  It was SO much fun.  If you live in the Cedar Rapids area, I highly recommend visiting Allen's.  
Allens is an adorable orchard with 29 varieties of apples, including the popular Honeycrisp!  They also have several pear trees, and sometimes blackberries and raspberries (although this year they were hit hard by Japanese Beetles that ate most of their berries).  
You can pick your own apples or you can buy pre-picked apples in their store.  They also sell fresh baked apple and cherry turnovers, apple cake, apple blossoms, apple dunkers, apple cookies, and apple cider slushies!  Also in the store they sell a variety of seasonal fruits and vegetables along with apple butters, squash, and preserves!
They also have some absolutely adorable goats to entertain the kids!
The staff is extremely friendly and knowledgeable about their crop and they tell you exactly what is ready for picking and in which areas those trees are located.  They also give you a short tutorial on how to pick an apple so as to preserve as much of the growth for next year's crop.  They offer group tours and programs as well.  
Apple picking is a great way to promote healthy snacking.  Daniel loves to pick apples and in fact, for the past two years we have been going apple picking, he has picked an apple and eaten it right off the tree.  I think kids find it more fun to eat things they have either grown or picked themselves!  Plus, it gets the whole family outdoors and moving around!  What a great way to spend a couple of hours!


If you'd like to visit Allen's Orchard, they are located at 5801 N. 10th Street in Marion, Iowa. Their phone number is (319) 377-1408 and their e-mail address is allensorchard@gmail.com.  

The Best Zucchini Bread I Have EVER Eaten!

Friday, August 13, 2010

We have gotten so much zucchini from Abbe Hills that I have been making zucchini EVERYTHING.  I found this recipe for zucchini bread awhile back, I can't remember where, and then filed it away and forgot about it.  I came across it again when looking for something unique to do with my bazillion zucchini.  I changed it a little bit by adding some shredded apple and the flavor was AMAZING.  This bread is so moist and flavorful you will have a hard time believing it is made of zucchini (even if you love zucchini like I do).  Daniel calls it "cake."    Do not drain the zucchini, make sure you shred it and leave it as is, that is what makes it so moist.  This zucchini bread also freezes really well, so I have already made several loaves that I can just pull out of the freezer when I need something to bring to a function or have an unexpected visitor for tea!

Absolutely Gorgeous Zucchini Bread

  • 1 large (or two medium) zucchini, shredded (about 2 cups-DO NOT DRAIN)
  • 1 large apple, shredded
  • 3 cups flour
  • 2 1/4 cups granulated sugar
  • 3 large eggs
  • 3 tsp. cinnamon
  • 3 tsp. vanilla extract
  • 1 cup vegetable oil
  • 1 tsp. baking soda
  • 1 tsp. baking powder
  • 1 tsp. salt
  • 1 cup raisins
Preheat oven to 350 degrees.  Spray two loaf pans generously with cooking spray and set aside.  In a medium bowl, sift together the flour, cinnamon, soda, powder, and salt.  In the bowl of an electric mixer (or a large bowl) beat together the eggs, sugar, oil, and vanilla until well combined.  Add the flour mixture to the egg mixture and mix on medium speed until well combined.  Add the zucchini, apple, and raisins and mix on medium speed until well combined.  Pour the batter into the loaf pans, half of the batter into each.  Bake for 45 minutes to an hour or until a knife inserted into the center comes out clean.  Allow to cool for about 10 minutes in the pan then carefully remove loaves from pans and allow them to cool for 30 minutes on wire racks. Slice and serve (I like to spread some soft butter on my slice, yummmm!)

Until next time, happy and HEALTHY cooking and EATING!

Lean Kids Class

Tuesday, June 29, 2010


HAVE YOU ENTERED THE "MAKE YOUR OWN BABY FOOD KIT" GIVEAWAY YET?
IF NOT, BE SURE TO CLICK HERE! ONLY 3 DAYS LEFT TO ENTER!

GiveawayBlogdom

Hello Everyone! Today is Admirer Monday! Be sure to link up!


This past Saturday morning, I had the privilege of visiting the Lean Kids Class that is run through the Marion YMCA in Marion, IA by Becky Clabaugh. Becky and the Marion YMCA have partnered with Kara, the registered dietitian at the Marion Hy-Vee and Marion Independent Schools in Marion, IA to make this class available to kids and their families who may not otherwise be able to participate. This is a REALLY WONDERFUL program that focuses on helping kids make healthy changes in their lives through exercise, wellness, and nutrition education. The class runs for 6 weeks on Saturdays for 1 hour each week. Normally the class is held at the YMCA but this past week it was held at Hy-Vee where Kara organized a scavenger hunt for the kids to help them learn about how to make healthier food choices, read nutrition labels, and prepare a nutritious snack at the end. The kids were led around the perimeter of the store where they were instructed on the wonderful nutrient rich foods that they would be using to make their snacks. In addition, Kara taught the kids about NuVal, a type of scoring system for foods that helps you make better choices when grocery shopping. If you are interested in learning more about NuVal, you can visit their website. Currently, the Marion Hy-Vee has NuVal scores posted for a majority of the products they carry. I really enjoyed my visit and I hope that more classes like this will appear around the country!


Here are the recipes that are featured in the video:

Caramel Cheese and Apple Kabobs
  • Henning's Creamy Caramel Cheddar Cheese, cubed (if you can't find this, you probably could just use regular cheddar)
  • Apple slices
  • Wooden skewers or toothpicks
Cut apples into slices, thread apple and cheese onto kabob alternating apple then cheese, apple then cheese.

Valentine Parfaits
  • 1/2 cup vanilla yogurt
  • 1/2 cup Kashi Heart to Heart cereal
  • 1 cup sliced fresh strawberries
In each of two parfait glasses (or small bowls), pour 1/4 cup cereal. Top each with 1/4 cup yogurt and 1/4 cup sliced strawberries. Repeat layers once. Serve immediately.

Thanks so much for reading everyone! Until next time, happy and HEALTHY cooking and EATING!


Porter Pizza Friday

Friday, June 18, 2010

Today I decided to do something a little different for Pizza Friday.  I decided to offer a "Make Your Own Pizza Bar."  Daniel really loved making his own pizza.  I offered a variety of toppings, and each of us could choose what kind of pizza we wanted.  I included in this pizza bar:
  • Individual portions of pizza dough
  • pepperoni
  • sausage
  • spinach
  • sweet peppers
  • a variety of different types of shredded cheese
  • several different options for sauce - tomato, pesto, and alfredo
  • sliced scallions
On another note, I tried to make another snack critter for Daniel today.  It was kind of like a ladybug and Daniel laughed when he saw it.  I used half an apple for the body, covered it in peanut butter, a banana for the head, chocolate chips for the eyes, grapes for the spots, and carrots for the legs. 

Hope you all have a fantastic weekend!  Tomorrow's dinner will be onion cheddar burgers! Yum!  Until then, happy and HEALTHY cooking and EATING!


Roasted Garbanzo Beans

Sunday, June 06, 2010

I love, love, LOVE Garbanzo beans (also known as chickpeas), in any way, shape, and form. Garbanzo beans are not only super yummy, but also SUPER nutritious. They are the most widely consumed legume in the world and for good reason! They have a delicious buttery texture and a nutty taste. Garbanzo beans are a HUGE source of fiber, which lowers cholesterol and helps regulate the digestive tract. They also are known to lower your heart attack risk, lower your blood sugar, and they are chock full of iron and protein. I love to put them on salads, eat them as hummus, add them to soups, but my favorite way to prepare Garbanzo beans is to roast them. My roasted Garbanzo beans are always a hit! They are a great snack when you are craving something crunchy and salty, but much more nutritious than chips. I once had one of my friends compare them to corn nuts, but WAY healthier! There are many different ways you can season your roasted Garbanzos, but I like to make them as simple as possible.


Roasted Garbanzo Beans

  • 2 cans Garbanzo beans
  • 1 tsp olive oil
  • 1/2 tsp garlic powder or granulated garlic (more if you love a garlicky flavor, less if you don't)
  • 2 tbsp dried italian herbs
  • a pinch of salt and black pepper to taste
Preheat the oven to 350 degrees and spray a cookie sheet with cooking spray. Drain and rinse the beans. In a medium sized bowl, add the beans and the rest of the ingredients and mix until the beans are well coated. Spread in a single layer on the cookie sheet. Bake in the oven for about an hour or until the beans have shriveled slightly, are browned, and are crunchy. Because I am a lover of cheese, I sometimes add a little parmiggiano reggiano (parmesan) to them before baking as well.

These are great take along snacks. Daniel LOVES them and if allowed, would eat the whole bowl all at once! I also like to put these on my salads sometimes in the place of sunflower seeds or sliced almonds!

Enjoy and until next time, happy and HEALTHY cooking and EATING!

Arancini (Italian Rice Balls)

Friday, May 21, 2010


Have you signed up for the web class on May 25th yet?  Click here to sign up!  Space is limited!


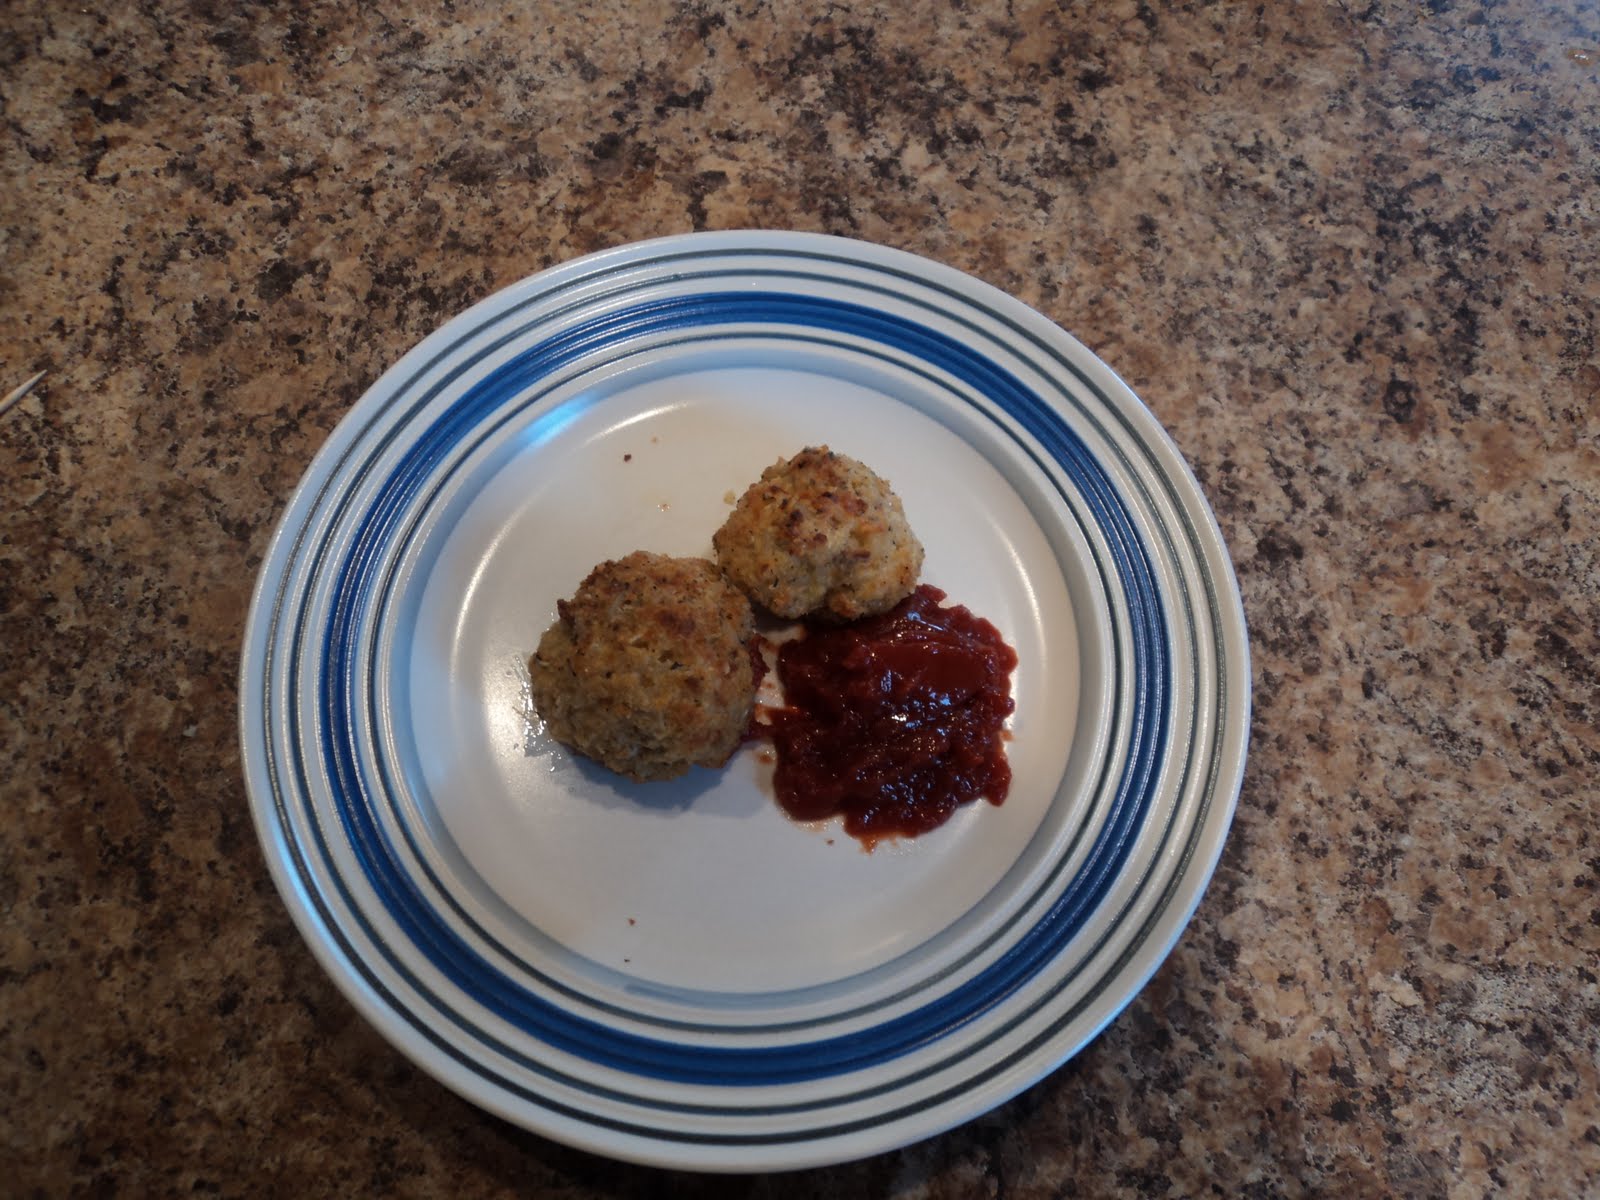
I hate wasting food. I feel that one of the biggest problems in this country is the amount of food waste we generate as a people.  There are countries in this world that don't have enough, and yet, we have oversized portions and massive amounts of waste.  One thing I like to do is use my leftovers in another meal or snack.  Arancini, which are Italian Rice Balls, are a great use up for leftover rice.  They make the perfect snack, appetizer, or light lunch.  I serve them plain or with ketchup.  Daniel LOVES Them.  My version of Arancini is not traditional by any means, but it sure is delicious!  The great thing about these too is that they can be easily frozen.  Traditional Arancini are deep fried, I oven fry mine.  


Elizabeth's Version of Arancini (Italian Rice Balls)

  • 1-2 cups cooked brown rice (you can use white rice too if you have that)
  • 2 large eggs, slightly beaten
  • 1-2 cups bread crumbs - divided
  • 1 cup pureed sweet potato, squash, or cauliflower
  • 1/2 cup mozzarella cheese or italian cheese blend, shredded
  • 1 cup parmesan cheese, divided
  • 1 tbsp. italian herbs
  • 1 tsp. granulated garlic or garlic powder
  • 6 slices turkey bacon, cooked and crumbled (I just microwave it between two paper towels for one minute per slice).
  • 4-6 tbsp. melted butter or olive oil
Preheat your oven to 450 degrees.  Line a cookie sheet with aluminum foil and spray generously with cooking spray.  Set aside.  In a large bowl, combine all the ingredients except 1/2 cup of the parmesan, half of the bread crumbs, and the butter or olive oil, until it comes together and is "dry."  If the mixture sticks together then you have the right consistency.  If the mixture is too wet, add more bread crumbs.  


In a shallow dish, mix the rest of the bread crumbs and the parmesan.  With wet hands, form the rice mixture into balls the size of a ping pong ball. 


 Coat with the bread crumb mixture and place on the cookie sheet. 


 Drizzle each ball with a little butter or olive oil, this will help the balls crisp in the oven.   Bake in the preheated oven for 10-15 minutes or until slightly browned.  Broil on high for another 3-5 minutes until well browned - be sure to watch it because they can burn quickly under the broiler!Remove from the oven and allow to cool slightly, about ten minutes before serving.  

To freeze these, bake and broil them as indicated.  Allow to cool completely.  Place on a clean cookie sheet lined with parchment or wax paper.  Place in the freezer for 2-3 hours until fully frozen.  Once frozen, place in Foodsaver bag or Ziplock freezer bags.  To reheat, remove from freezer bag, line on a cookie sheet, and bake for 15-20 minutes at 400 degrees until heated through.  


Enjoy!
Until next time, happy and HEALTHY cooking!


Date Night Popcorn

Sunday, May 16, 2010

When you have children, it is really important to spend quality time with your spouse, as a couple.  Unfortunately, date nights can get expensive, especially when you are in the boat that David and I are in.  We moved to Iowa, away from our family, so free babysitting isn't an option for us!  If you want to go to a movie, for example, by the time you pay the babysitter ($7 an hour here), pay $13.50 each to get into the movie, and then treats at the movie theater, the cost of your date night can come close to $100!  Even more if you want to go out for dinner!  
David and I have come up with a more cost efficient date night that can be done at home.  We do this once per week and we spend just as much quality time together as we would if we went out.   Every Saturday, David and I rent a movie or two and after Daniel goes to bed, we make popcorn and watch movies.  It is one of my favorite things to do.  It is also nice because we are watching movies in the comfort of our own home, and we can talk.  We can also tend to Daniel.  Sometimes we add dinner to this mix by feeding Daniel at the regular time, and then we make a nice dinner for ourselves later, after he has gone to bed.  

We don't make microwave popcorn, as it has all sorts of yucky chemicals added to it.  We pop corn the old fashioned way, on the stove.  Here's how we prep our popcorn:

Date Night Popcorn
  • 1/2 cup popcorn kernels
  • 1/8 cup vegetable oil
  • 1/2 stick butter melted (optional)
  • 1/2 cup grated parmesan cheese (optional)
  • 1 tsp. salt (optional)
In a medium sized sauce pan, place the oil and a couple of kernels over medium heat.  Wait for the kernels to pop. 


Once the kernels have popped, pour the rest of the kernels into the pot and place the lid on.  Cook over medium heat, shaking the pot occasionally in order to keep the kernels from burning.  


Once the popcorn starts to pop regularly, keep the lid on and shake the pot regularly to keep the un-popped kernels from burning on the bottom of the pot.  

Wait until the popping slows and becomes intermittent.  Pour the popcorn into a large bowl and top with butter, salt, and parmesan cheese (if desired) and mix with your hands to evenly distribute.  


And there you have it- a movie and popcorn at home!  Date night on the cheap!  Until next time, happy and HEALTHY cooking!

Kid Friendly Snacks

Tuesday, April 20, 2010


"Mommy, I'm hungry!" Children will eat as much as they need throughout the day, and most of the time, they need three meals and two snacks. Children also need and LOVE routines when it comes to eating. They need regularly scheduled meal and snack times, and when this is the case, they have better appetites. So I have been focusing this blog around meals, now I would like to take a little time to talk about snacks.
Daniel and I belong to a lot of playgroups. I have noticed that more often than not, the snacks served at the playgroups are highly processed and very high in sugar - for example, fruit snacks, the packaged rice crispy treats, cookies, etc. One other thing that has floored me, is that every time I have hosted a playgroup in my home, I have always provided fresh veggies and dip, and they are never touched. Not even by the moms! When I am in charge of snack for a playgroup, I try to bring whole foods, and I make sure that Daniel gets healthy and delicious snacks at home. Here are some of my favorite snack ideas:

  • Fresh fruit - kids tend to really love fruit. Sometimes I make "fruit kebabs" where I place two or three different kinds of fruit on mini wooden skewers. I use whatever I have on had, bananas, strawberries, kiwi, pineapple, you name it!
  • Cheese Sticks - Sargento makes string cheese, Colby jack cheese sticks, even pepper jack cheese sticks. Daniel LOVES cheese. These are also really easy to take with you.
  • Edamame - Edamame is a tasty little treat that is fun to eat! You can usually buy it frozen but sometimes you can find it fresh too. It packs a powerful punch of protein and fiber. Just remember to remove the soybeans from the pods because the pods are not edible!
  • Raw veggies and dip- I have found that Daniel will eat anything he can dip. His favorite are mini sweet peppers, he also likes cucumbers, carrots (these should be cooked until the age of 3 to prevent choking), and broccoli (also should be cooked until the age of 3).
  • Frozen peas or corn- I know this sounds odd, but my brother, who is 26 still eats frozen peas and corn as a snack, right out of the freezer. My brother also will pull other types of frozen fruit and veggies and eat it. He has been doing it since he was old enough to get into the freezer himself. Daniel also loves this as a snack, we call it "freezer treats." It is especially good for infants and toddlers who are getting teeth because it soothes aching gums.
  • Peanut butter and banana burrito- Just spread peanut butter on a flour tortilla (I like to use whole wheat tortillas) and top with bananas, then roll up. You can also cut them into bite sized pinwheels.
  • Apples with Peanut Butter Dip
  • Yogurt or cottage cheese with fruit- Daniel LOVES yogurt and cottage cheese. I usually will cut up some fruit and mix it with the yogurt or cottage cheese, like pineapple, strawberries, melon, mango, or bananas.
  • Clementines- These are called the "Little Zipper Fruit" because they are small and easy to peel. Daniel is totally a fan of these. They are also great cause they're so portable and they're seedless!
  • Snack Mix- I like to take a snack sized ziplock bag and fill it with a mix of dried fruit pieces, Cheerios (regular old Cheerios, without any added flavoring or sugar), and either cheese flavored Annie's Bunnies or Goldfish Crackers (these are great because they are all natural and now whole grain!)
  • Smoothie Pops- I got this idea from my friend Traci who is a fellow Foodie Mommy. Basically all you do is make a smoothie in your blender using any kind of frozen fruit you like (I buy a frozen fruit blend at Sam's that Dole makes, it is all natural with no added sugar) and then you add that with 1 cup milk and 1 cup yogurt and then blend until smooth. Pour into ice pop molds and freeze overnight. Smoothies themselves are also great snacks too!


  • Zucchini, Carrot and Chocolate Chip Mini Muffins - This one is my personal favorite and I will provide you with the recipe. This is the snack I bring to most of my playgroups when it is my turn. As many of you know, I like to "hide" vegetables in my food. To be honest, I am not truly hiding the vegetables as my family knows they are in there. Also, I am not substituting the hidden vegetables for serving vegetables with the meal, it is just a little something extra. I am not a huge fan of being dishonest about hidden ingredients, I feel it is important for kids to be exposed to all sorts of colorful produce. I just happen to feel that if I can boost my family's vegetable intake that much more, it is even better. So anyway, these muffins are basically chocolate chip muffins with a little something extra. You can always substitute the chocolate chips for raisins or other dried fruit and nuts if you like. This recipe makes about 84 muffins, give or take, and they freeze beautifully in an airtight container.
    • 3 cups flour (I use half all purpose, half whole wheat)
    • 1 tsp. baking soda
    • 1 tsp. baking powder
    • 1 1/2 tsp. cinnamon
    • 1 cup honey
    • 1/2 cup vanilla yogurt
    • 1 cup oil (I use vegetable oil)
    • 4 eggs
    • 1 tsp. vanilla
    • 1 cup finely grated zucchini
    • 1 cup finely grated carrot
    • 1/2 cup mini chocolate chips, raisins, other dried fruit, or nuts (optional)


Preheat oven to 350 degrees. Lightly coat mini muffin tins with cooking spray or line with mini muffin liners.
In a small bowl, mix together first four ingredients and set aside. In another bowl add honey, eggs, and vanilla. Beat with an electric mixer until combined. Add the vegetable oil and continue beating until blended. Stir in the zucchini and carrots and beat to blend. Stir in the dry ingredients a little at a time until all is incorporated. Add the mini chocolate chips (or whatever additional fruit or nuts) and mix well.
Fill muffin cups to about 3/4 full. Be careful not to overfill the cups as the muffins will rise too high and stick to the pan. Bake for 10-12 minutes or until muffins are light brown and a toothpick inserted into the center of a muffin comes out clean.

If you have any ideas about snacks out there, I would LOVE to hear them!

Until next time, Happy Cooking!


Tea Parties Aren't Just for Little Girls

Tuesday, March 30, 2010

I LOVE tea parties. When I was teaching, I used to host a Ladies Back to School Tea at my home every September. Now that I am a stay at home mom, a tea party is a great excuse to invite my friends and their kids over for play dates. I usually offer a wide variety of teas, so that everyone can have a choice of what she would like to drink. In addition, I love to make scones. They are SO easy, especially if you have a scone pan, and what pairs better with tea than a scone!
Tomorrow I am hosting a tea party at my house and have invited my friends Traci, Hayley and Melissa to join me. Daniel and I spent the morning making three different kinds of scones: raspberry white chocolate ricotta, blueberry ricotta with lemon glaze, and ginger. Scones are also a really great breakfast or brunch item. Twice a month, we have weekend family breakfasts in our house, and many of those mornings, scones are featured. My husband David especially likes the blueberry ricotta scones with lemon glaze.
The blueberry scone recipe that I use is from Tyler Florence's book "Tyler Florence's Real Kitchen." The only change I make is that I add 1/2 cup of ricotta when I have it on hand, and instead of cream I use a mixture of half sour cream and half whey. Let me just say that I LOVE Tyler Florence. I love Tyler Florence so much that I have almost all of his cookbooks and am constantly making his recipes. I even tried to convince David to let us name our son Tyler Florence Porter - although David put the kibosh on that right away. But I digress...


I have had the recipe for the raspberry white chocolate ricotta scones FOREVER. I am not sure where it came from but it has been one of my tea party staples for years. In fact, whenever I used to host the back to school tea parties, people used to tell me they would only come if I served those scones! Here's the recipe:


2 1/2 cups flour
3 tbsp. sugar
2 1/2 tsp baking powder
1/2 tsp salt
1/3 c. cold butter cut into cubes
1 large egg
1/2 tsp almond extract
1/2 c. heavy cream or a milk and sour cream mixture- half milk, half sour cream (or you can use whey instead of milk)
1/2 c. ricotta cheese
3/4 c. frozen raspberries (do not thaw)
2/3 c. white chocolate chips


Preheat oven to 400 degrees. Mix flour, sugar, baking powder, and salt until just mixed by hand or with an electric mixer. Cut in butter using two knives or pastry cutter (or with the kitchen aid), until the mixture resembles course crumbs. Add the rest of the ingredients and mix until just combined. Do not over mix. Drop heaping spoonfuls of batter into a greased scone pan, or onto a greased cookie sheet. You can also add a bit more flour to make a stiff dough and press dough into a circle, and cut the dough into triangles using a pizza cutter. I have never done this, but many scone recipes suggest it. Sprinkle scones with sugar. Bake for 20 minutes or until scones are lightly golden on top and a toothpick inserted into the center of each scone comes out clean. Allow to cool for 5 minutes, then enjoy!


If you have never had a ginger scone before, let me tell you, you are DEFINITELY missing out! They have a unique flavor that really pairs well with most teas and coffee. I first had a ginger scone at a coffee shop in Seattle, after that, I was hooked. I came across this recipe a couple of years ago, and it has become my absolute favorite scone recipe, hands down!


1 cup all purpose flour
1 cup cake flour
1 tbsp. sugar
1/2 tsp. dried ginger (you could also use fresh ginger if you have it on hand)
1/2 tsp. salt
1/2 tsp. baking soda
1 tsp. cream of tartar
4 tbsp. cold butter cut into cubes
1 cup crystallized or candied ginger, chopped
3/4 c. milk (or whey - I love cooking with whey)
2 tbsp. sour cream
1 egg yolk beaten with 1 tsp cold water for an egg wash


Preheat oven to 450. Combine dry ingredients. Use a pastry cutter or two knives (or your Kitchen Aid) to cut in butter until it resembles course crumbs. Add the crystallized ginger bits, the milk and the sour cream and mix until just incorporated. The dough should be soft and moist. Do not over mix. Drop heaping spoonfuls of batter into a greased scone pan, or onto a greased cookie sheet. You can also add a bit more flour to make a stiff dough and press dough into a circle, and cut the dough into triangles using a pizza cutter. Brush with egg wash and sprinkle with sugar. Bake for 12-15 minutes or until lightly golden brown and a toothpick inserted into the center of each scone comes out clean. Allow to cool. Serve with your favorite jam and butter.


The key when making scones is to never over mix your dough, otherwise they become dense and gummy.

Anyway, that is all for now. Until next time Foodie Mommies and Daddies, happy cooking!

The Foodie Mommie Copyright © 2009 Designed by Ipietoon Blogger Template for Bie Blogger Template Vector by DaPino