Showing posts with label sandwich. Show all posts

And the heat goes on....Chicken Souvlaki Sandwiches

Wednesday, July 20, 2011

It is so hot here that there have been reports of concrete buckling.  Last night the worst possible thing could have happened.  The power went out.  It went out at around 7:30 last night and didn't come back on until after midnight.  At 10:30 last night the temperature outside was a lovely 93 degrees and without air conditioning, the temperature in the house was quickly rising to unbearable levels.  Yuck.  What is worse is that only our block was out of power, all the houses around us were on!  Fortunately the power came back on before it got too miserable in the house.  
Tonight I made Chicken Souvlaki sandwiches.  I got this recipe from Betty Crocker and made a few changes.  You will find my changes to the recipe in RED.


Chicken Souvlaki Sandwiches

  • 3 cups chopped cooked chicken (I used a roasted chicken)
  • 1 cup chopped peeled cucumber
  • 1/3 cup finely chopped red onion (I can't eat raw onion, not even raw green onion so I roasted the onions in the oven and then finely chopped them.  Raw onion literally makes me sick, I don't know why, but I just can't eat it).
  • 1/3 cup sour cream
  • 2 tablespoons chopped fresh dill weed
  • 2 tablespoons mayonnaise or salad dressing
  • 1 tablespoon red wine vinegar (I was out of red wine vinegar so I substituted apple cider vinegar)
  • 1/4 teaspoon salt
  • 1/8 teaspoon pepper
  • 6 pita fold breads (5 inch) (I used the folditbread and it worked perfectly!)
  • The original recipe also called for 1/3 cup crumbled feta cheese, but I do not like feta, so I left it out.
In medium bowl, place all ingredients except pita breads; toss until evenly coated. Divide mixture evenly down center of each pita bread; fold in half.


STAY COOL, and until next time, happy and HEALTHY cooking and EATING!

Pulled Chicken Sandwiches

Friday, April 01, 2011

This is a quick chicken sandwich recipe that is super yummy.  It is always a big hit in my house!  I serve it with homemade oven fries or raw mini carrots.  The leftovers are great too!


Pulled Chicken Sandwiches

  • 1 whole roasted chicken (homemade or store bought), meat removed and pulled apart (to pull the chicken apart, place in a large bowl and pull apart using two forks)
  • 1 small onion, chopped
  • 4 cloves garlic, minced
  • 1/3 cup ketchup
  • 2 tbsp. yellow mustard
  • 1 tbsp. molasses
  • 1/3 cup apple cider vinegar
  • 1 tbsp. olive oil
  • 4 hamburger buns (I used whole wheat), toasted (if desired)
  • Your favorite condiments for serving (I like relish and mayonnaise)
In a large deep sided skillet cook onion and garlic in olive oil over medium high heat until onions are soft.  Add the vinegar and allow to reduce by half, about 1 minute.  Add the ketchup, mustard, and molasses and whisk together.  Add the chicken and stir, cooking until heated through.  Spoon chicken mixture onto toasted hamburger buns and top with your favorite condiments.  

Until next time, happy and HEALTHY cooking and EATING!

A Super Easy Lunch Idea - TPR Sandwiches

Tuesday, January 04, 2011

I'm sure these sandwiches are not unique to my family, but my mom used to put them in my lunch when I was a kid.  She named them TPR Sandwiches (Toilet Paper Roll Sandwiches - don't ask, our family is strange sometimes...haha).  They are kid friendly, quick, easy, and delicious.  Slice them up and they make awesome party sandwiches!  I make them and put them in David's lunch, and Daniel LOVES the pineapple and ham ones! For a meatless option, try the salsa and green chili TPR!


Classic TPR Sandwiches (makes one sandwich)

  • 1 large flour tortilla
  • 3 tbsp. plain cream cheese
  • 1/2 tsp. cumin
  • 1 tbsp. salsa
  • 2 slices deli turkey
Mix the cream cheese, cumin and salsa and spread onto the tortilla.  Place turkey on top of the cream cheese mixture and roll up tortilla.  Slice in half if desired.

TPR Variations


Turkey and Garden Veggie TPR

  • 1 large spinach tortilla
  • 2 slices deli turkey
  • 3 tbsp. garden vegetable cream cheese
Ham and Pineapple

  • 1 large tortilla
  • 2 slices deli ham
  • 3 tbsp. pineapple cream cheese


Salsa and Green Chili 
This is a meatless option!
  • 1 large jalapeno tortilla
  • 1 can diced green chilies
  • 1 tbsp. salsa
  • 3 tbsp.  plain cream cheese
Roll up and cut the recipe variations just like the classic recipe!

Foodie Mommie Recipe Make-Over: Cheeseburger Hoagie Sandwiches

Tuesday, October 19, 2010


The Foodie Mommie October Sale ends TOMORROW at 10 pm!  Don't forget- 10% off your entire purchase of Pampered Chef Products! Visit the Foodie Mommie store to take advantage of this great offer!


Here's a super quick and easy recipe brought to you by The Pampered Chef and made over in true Foodie Mommie style!  This is also one of Daniels favorites.  It comes from The Pampered Chef It's Good for You cookbook.  I really like the Pampered Chef recipes and cookbooks but sometimes they call for ingredients on my "yucky no-no" list, in which case I need to make them over!


Cheeseburger Hoagie Sandwiches


  • 1 lb ground turkey or beef
  • 1 (8 oz.) package grated cheddar cheese (or I like to use a cheddar jack blend)
  • 1 onion, chopped
  • 1 garlic clove, minced
  • 1/4 cup ketchup
  • 2 tbsp. yellow mustard
  • 1/2 cup pureed squash (optional)
  • Your favorite burger toppings (I like shredded lettuce, ketchup, mustard, mayonnaise, relish, sliced tomatoes, etc.)
  • 4 soft  hoagie rolls
 Cook the turkey or beef, onion, and garlic in a large, deep sided skillet over medium high heat.  Once the meat is no longer pink, add the ketchup, mustard, and squash and stir well to combine.  Turn heat down to medium low.  Add 1/2 the cheese and heat through until melted.  Cook another 5 minutes stirring frequently until mixture is hot and bubbly.  Spoon mixture into hoagie rolls and garnish with your favorite burger toppings and condiments.  Top each sandwich with remaining cheese.  Yummy!


Happy and HEALTHY cooking and EATING!

Slow Cooker Sausage, Peppers, and Onions Hoagies

Sunday, September 26, 2010

Don't Forget to stop by The Foodie Mommie Store between now and September 29th to take advantage of the AWESOME Grand Opening Sale!  Lots of great deals and SUPER giveaways!

This recipe is so easy it's ridiculous!  If I am not serving the sausage, peppers, and onions in a sandwich, I serve it over polenta, pasta, even rice it's great!  It makes for a super easy weeknight meal.  As it is made in the slow cooker, just set it and forget it!

Slow Cooker Sausage, Pepper, and Onion Hoagies

  • A package of 5 fresh italian sausage links (I used turkey sausage but you can use pork if you prefer)
  • 3 large bell peppers, any color you like, sliced
  • 2 onions, sliced
  • 1 cup spaghetti sauce (I used homemade but you can use store bought)
Place the peppers and onions on the bottom of the crock of your slow cooker.  Then place the peppers on top of the onions and peppers.  Pour the sauce over the sausages, onions and peppers.  Cover and set your slow cooker to high.  Cook on high for 4 hours.  Remove the sausages and slice.  Return them to the slow cooker and cook on high another 30 minutes.  Serve this mixture on rolls as sandwiches, over polenta, pasta or rice! Yum!


Until next time, happy and HEALTHY cooking and EATING!

Italian Chicken Buddies

Wednesday, September 08, 2010

This is just a quick post to share something I did with last night's leftovers for lunch today.  I took the leftover chicken patties and heated them in a 350 degree oven for about 5-10 minutes.  Then I topped them with some provolone cheese and heated just until melted.  I served it on a bun topped with some of my tomato sauce (you can use store bought too).  Yummy!


Chicken Buddies (Chicken Patty Sandwiches)

Tuesday, September 07, 2010

I love chicken sandwiches.  I came up with this one after remembering a chicken sandwich I used to have as a kid.  I can't remember where the chicken sandwich was from but I remember it was called a "Chicken Little."  It was a simple sandwich made from a chicken patty served on a hamburger bun with mayonnaise, ketchup, and tomato.  Sometimes you could add cheese to it.  I have made my own version of that sandwich here, and I've named it Chicken Buddy.  I am not sure where Chicken Buddy came from, it just popped into my brain and stuck!  This sandwich is really yummy, fast, fits in with a tight budget, and is something you can feel good about eating because YOU made it!  It can be prepared ahead of time or leftover patties can be easily frozen for another quick and easy meal!  I served these up with some oven fried sweet potato fries!  Yum!


Chicken Buddy Sandwiches


  • 2 lbs boneless, skinless chicken breast
  • 1/4 cup mayonnaise
  • 2 tsp. dijon mustard
  • 1/4 - 1/2 cup grated cheese (like cheddar, jack, parmesan, whatever you like.  I used a cheddar jack blend)
  • 1 tbsp. granulated garlic
  • 1 tbsp. dried italian herbs
  • 2 large eggs
  • salt and pepper
  • 4 tbsp. butter, melted
  • 1/2-1 cup seasoned bread crumbs (I used my own but you can use store bought)
  • hamburger buns, sliced cheese, condiments for serving
In a food processor, process the chicken breast until the consistency of ground chicken (however, do not use ground chicken, these will not turn out the right way).  This will take less than a minute.  Remove the chicken to a bowl.  Add the eggs, mayo, dijon, cheese, garlic, herbs, half of the bread crumbs, salt and pepper.  Mix well.  Place the other half of the bread crumbs in a shallow dish.  The mixture will be wet.  With damp hands, form the mixture into patties.  Coat each patty lightly with bread crumbs.   Cover with plastic wrap and place in the fridge to "set" a minimum of one hour and as long as overnight.  Preheat the oven to 400 degrees.  Remove the patties from the fridge and drizzle with the butter (this helps them crisp up in the oven, if you don't want to use butter you can use a little olive oil).  Bake 20-25 minutes turning halfway through cook time.  Top with slices of cheese (if desired) and continue baking until melted.  Serve on a bun with your favorite toppings!  

Enjoy!  Until next time, happy and HEALTHY cooking and EATING!

Budget Friendly Meal- Caprese Salad and Chicken Pesto Panini

Wednesday, August 25, 2010

This is a meal that, when in season, is extremely budget friendly.  I make it a lot during the summer when tomatoes are in abundance, and if you grow your own tomatoes, it's even more economical!  Tomato plants are so cheap and you really can't go wrong when growing them, they are so super easy!  I used to plant them in a pot on my deck when I lived in an apartment and I got so many tomatoes I hardly knew what to do with them!  Basil is the same way.  It can be expensive at the grocery store, but a basil plant costs next to nothing and grows like a weed.  In no time whatsoever it will take over your garden if you let it (as will mint).  You can even grow basil indoors in the wintertime by planting it in a pot and placing it in the window.   Again, you can't go wrong.  
I love Caprese Salad.  The very essence of it screams late summer!  If you have never had Caprese Salad, it is a flavorful trio of beautiful, ripe red tomatoes, gorgeous and fragrant green basil, and mild fresh mozzarella.  I round it out with a simple dressing of olive oil and balsamic vinegar.  YUM!


Caprese Salad

  • 2-3 ripe roma or hothouse tomatoes, sliced
  • 1 (8 oz) ball fresh mozzarella, thinly sliced
  • 10-20 basil leaves
  • 1 tsp. balsamic vinegar
  • 1 tsp. olive oil
  • 1/4 tsp. italian herbs
  • salt and fresh ground pepper to taste
Arrange the salad by placing sliced tomatoes, then basil, then cheese in kind of a circle fanned out on a plate, or in lines.  In a small bowl, mix together the vinegar, olive oil, herbs, salt and pepper.  Drizzle over tomatoes, cheese and basil.  Enjoy, it's really yummy!

Panini is like a fancy grilled cheese sandwich.  You can add whatever you like and you don't even need a panini press to make it.  I used to have one of those fancy panini presses, but cleaning it was a pain, and after awhile it broke.  I just make panini in my grill pan and place a heavy pot on top of the sandwiches to smoosh them down.  I made a nice pesto aioli and piled these sandwiches with thin slices of chicken breast, tomatoes, and provolone cheese.  Yummmm!


Chicken Pesto Panini (this is for one sandwich)

  • 2-3 slices thinly sliced chicken breast (I go to the deli counter and ask them to thinly slice some chicken breast for me, I ask them to do it fresh and not take it from the stuff that has already been out because I fear deli meat)
  • 2 thin slices of fresh tomato
  • 1 tsp. pesto aioli (see recipe below)
  • 2 slices provolone cheese
  • 2 slices good bread (I like to us a fresh sourdough or last night I used homemade brioche).
Spread aioli thinly over both slices of bread.  Place a slice of cheese on each slice of bread.  Pile on the rest of the ingredients on one slice of bread and top with the other slice of bread and cheese.  Grill using a panini press or a grill pan and pressed down with a large, heavy pot for about 3 minutes on each side or until the cheese is sufficiently melted.  Enjoy!

Pesto Aioli
  • 1/2 cup homemade or store bought mayonnaise (I use homemade)
  • 1/4 cup homemade or store bought pesto sauce (I also use homemade for this)
Mix the two ingredients together until well incorporated.  Spread on sandwiches, use as a dipping sauce for chicken strips, or as a dip for veggies.

I hope you enjoy these budget friendly recipes!  Until next time, happy and HEALTHY cooking and EATING!


Maid Rite Sandwiches with De Luxe Potatoes

Tuesday, August 17, 2010

Well Hello Dear Readers!  Tonight I have a really great recipe to share with you straight out of the Midwest, but first, I have some GREAT news!  I just received the regulations from the FDA for selling my mixes online and guess what?  I am allowed to do it!  So the Foodie Mommie Store will be opening very soon!  I have a few people who have agreed to be product testers for me, so if you are interested in that, I am still accepting food tester requests, just e-mail me with your address and as soon as I get things organized I will be sure to send you some products to test!  I have a meeting with my friend Hayley who is going to do this with me at the end of the month, so things are coming together nicely!
I did happen to test out my Ranch Dressing mix this weekend and David was not a fan...I need a few more people to tell me how it is before I yank it from the list.  I need testers who can be absolutely brutally honest with me.  


Anyway, onto tonight's recipe.  Since moving to the Midwest almost two years ago I have found very little that I like, however I did come across quite a nice little sandwich a couple of months ago.  We have a little diner not too far from our house called the Maid Rite.  David and I went in for lunch one day and ordered hamburgers expecting, well, hamburgers.  What we got were kind of like Sloppy Joe's but without the sauce.  They were REALLY yummy!  A couple of weeks later, my friend in Mom's Club made some of these sandwiches for a cooking club one day.  I had mentioned that I had never heard of a sandwich like this, other than Sloppy Joe's.  I guess it is not very nice to compare Maid Rites to Sloppy Joe's.  My friend Hayley said that these sandwiches are called Maid Rites in Iowa, after the restaurant that invented them.  Another friend mentioned that these sandwiches are a Midwest tradition and you would be hard pressed to find them anywhere else - I certainly had never heard of them before moving here.  That same friend said that they have a different name depending on which state you live in but they were invented in Iowa by the Iowa Maid Rite Cafe.  
So, tonight I thought I would try my hand at making a Midwestern favorite, I got this recipe from my friend in Mom's Club.  It breaks a few of my food rules (one of the main ingredients is Pepsi, but oh well, once isn't going to hurt anything, it's when we make it a habit that all goes awry).  I served these up with my De Luxe Potatoes, which also have a story to them (which I will tell in a minute).


Maid Rite Sandwiches

  • 1 lb ground beef (I usually use ground turkey but my friend told me you cannot make a Maid Rite with ground turkey, it just doesn't turn out right)
  • 1 onion, finely chopped
  • 2 tbsp. yellow mustard
  • 1 tbsp. brown sugar
  • 1 tbsp. white sugar
  • 1 tsp. granulated garlic or garlic powder
  • 1/2 can (6 oz) Pepsi (or Coke)
  • 4 hamburger buns
  • your favorite burger toppings - ketchup, mustard, pickle relish, mayonnaise, cheese
In a large skillet, saute the beef until well browned.  Drain the beef in a colander and rinse it with warm water (I know, strange, but necessary according to my friend).  Add the beef back into the skillet along with the rest of the ingredients (except the buns and the burger toppings of course) and simmer over medium high heat until the liquid is completely absorbed by the meat (about 10 minutes or so), stirring occasionally.  Serve the meat in a hamburger bun with your favorite burger toppings and a sprinkling of grated cheese if desired!  REALLY YUMMY!

De Luxe Potatoes
There used to be this guy that had a sandwich shop just off campus when I was in college. We called him the Sandwich Guy cause he made the best sandwiches in town.  One day he started offering what he called "pommes de terre americains de luxe." (luxurious American potatoes) I asked him what made them "Americains" and he said that Americans love potato wedges that are seasoned.  Hmm...ok.  So anyway, finally I asked him for the recipe because these potato wedges were REALLY yummy, despite the strange name.  By the way, he also had a sandwich called "L'americain" which had ground beef and french fries in it.  Yah, again....ok...
I changed this up just a little by adding a hint of cayenne pepper for a little bit of a kick.  These also freeze really well.  I make a huge amount, serve some for dinner and freeze the rest.  To freeze them, just spread them out on a cookie sheet and place in the freezer for about an hour.  Then remove them to a ziplock or foodsaver bag, seal and place them back in the freezer.  To reheat, bake in 425 degree oven for 15-20 minutes or until cooked through.

  • 2 lbs new potatoes cut into wedges (I used a mixture of red, yukon golds, and adirondack reds)
  • 1 stick butter, melted
  • 3 tbsp. olive oil
  • 2 tbsp. granulated garlic or garlic powder
  • 1/4 tsp. celery salt
  • 1 tsp. salt
  • 1 tsp. black pepper
  • 1/4 tsp. cayenne pepper
  • 1 tsp. paprika
Preheat oven to 425 degrees.  Spray a large cookie sheet generously with cooking spray.  Place potatoes in a large ziplock bag and pour in butter and olive oil.  Mix spices together in a small bowl and pour into the ziplock bag.  Seal the bag and shake the potatoes around until they are completely coated with the butter, olive oil, and seasoning.  Bake for 25-30 minutes or until soft and beginning to brown.  Broil potatoes for about 5 minutes or so until crispy on the outside, watch them though, they can burn really fast!

I hope you enjoy these recipes.  Until next time happy and HEALTHY Cooking and EATING!

CBLT Wraps

Sunday, July 25, 2010

Be sure to enter the Eating for Beginners Giveaway.  Ends at midnight on August 1st!  Also, check out Challenge Post #2 for a chance to win 10 entries in the EFB Giveaway and a featured spot on my blog!


You will have to forgive me again for the lag time in posting.  This was last night's recipe. We are having such a hard time kicking this bug that is going around our house.  First David and Daniel had it, then Daniel got Impetigo, then I got whatever David had, and this is day two of that, so I feel pretty yucky.  I didn't even cook tonight.  Welcome to all my new followers, I promise to get around to visiting your blogs soon enough.  I also won an award that I need to post!  Being sick really isn't any fun!  Anyway...enough carrying on about that!  Onto tonight's recipe:

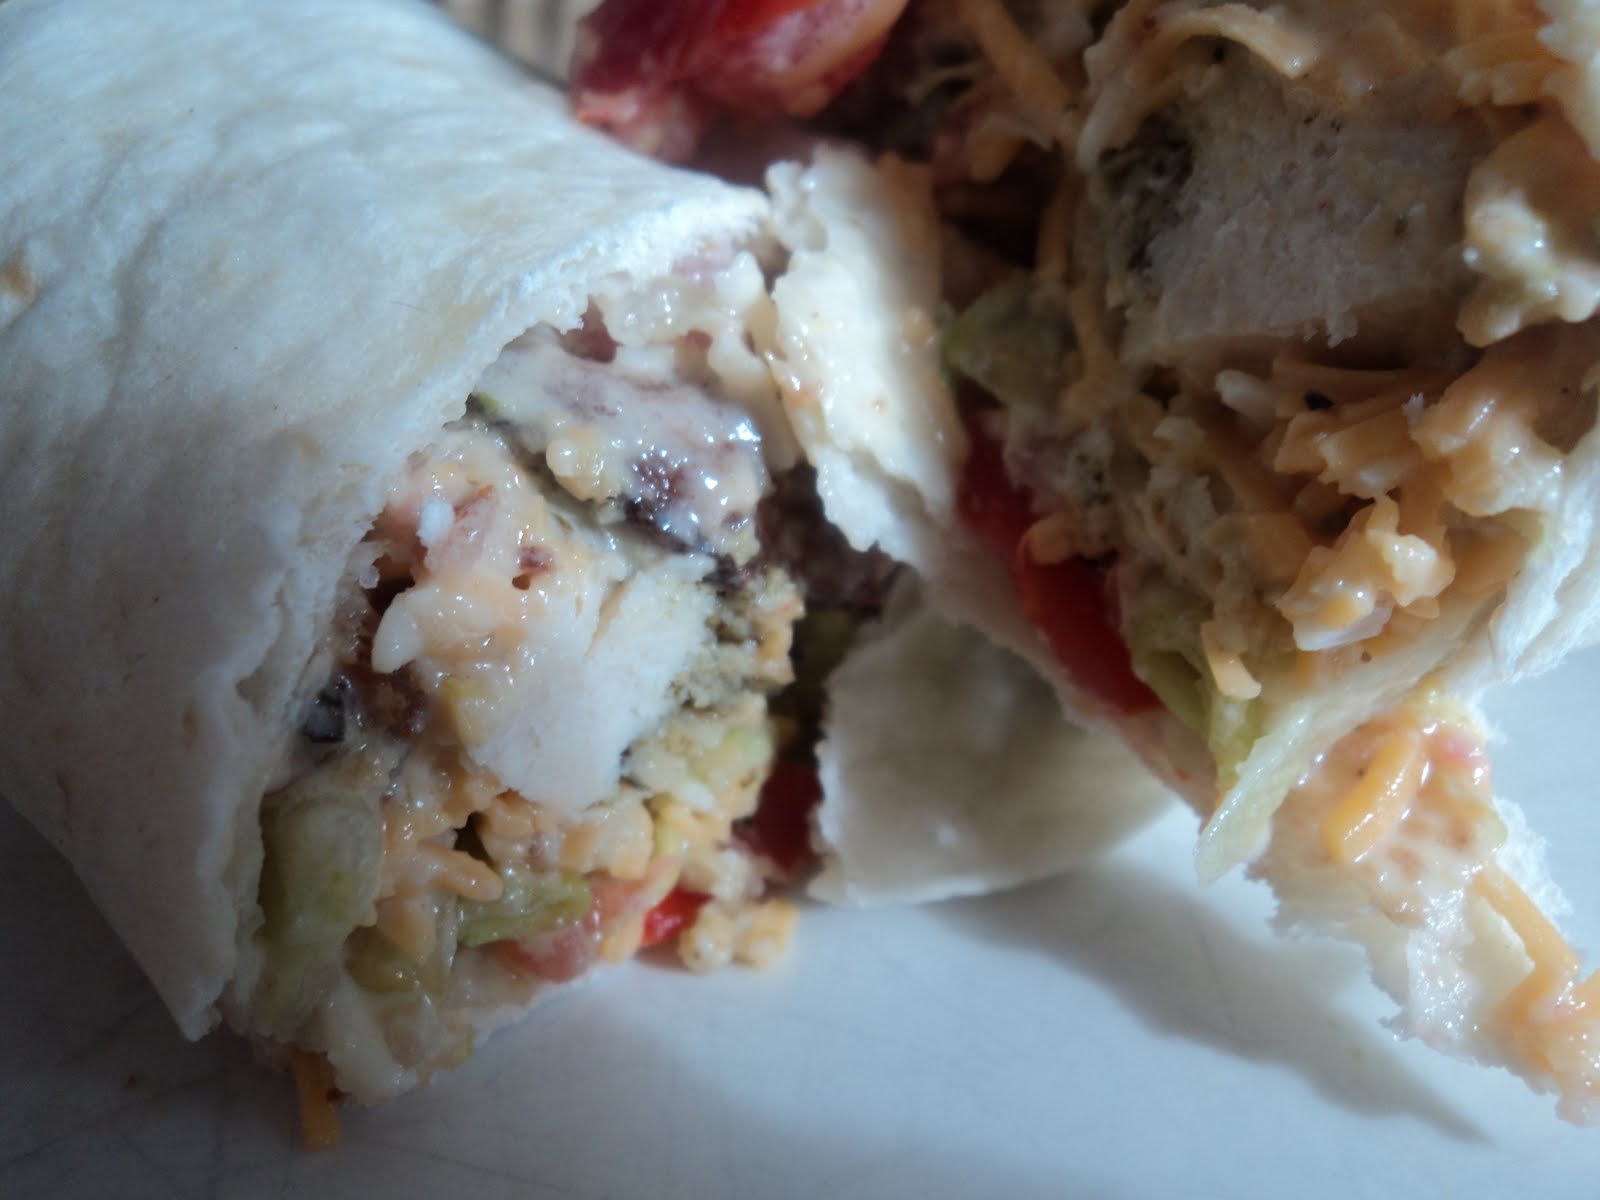
Here is a super easy recipe that takes about 5 minutes (and I mean 5 minutes literally) to whip together.  I make this with leftover chicken (last night I used the leftover Baked Crunch Pesto Chicken but you could use any leftover cooked chicken, or even a rotisserie chicken from the grocery store would work just fine)!  These are great for a quick dinner, picnics, or I sometimes take them along when we are traveling for an easy lunch!

CBLT (chicken, bacon, lettuce, tomato) Wraps 

  • 1 cup cooked chicken, diced
  • 1 tomato, diced
  • 1 cup shredded lettuce
  • 6 slices bacon, cooked and crumbled
  • 1/2 cup shredded cheddar cheese
  • 3 tbsp. mayonnaise (I used homemade cooked egg mayo, but you could use store bought)
  • 6 large flour tortillas
In a medium bowl, mix all of the ingredients together except for the tortillas.  Heat the tortillas in the microwave by placing them between two damp paper towels and heating for 30 seconds.  Place 1/3 cup of filling into the middle of the tortilla, fold sides of tortilla, and roll up to secure.  Enjoy!

Until next time, happy and HEALTHY cooking and EATING!


Asian Chicken Wraps

Tuesday, July 13, 2010

Have you signed up for the 30 Day Fit Family Challenge?  If not, head over to the challenge page and linky up!  You can join us even if you don't have a blog!  Let's make our families healthier together!


Daniel and I have been going on bike rides every day to stay fit.  We also go swimming several times per week.  We love to spend time outside when the weather is nice! 
Tonight Daniel helped me make Asian Chicken Wraps.  These are so good and SO easy!  

Asian Chicken Wraps
  • 2 large boneless, skinless chicken breasts cut into bite sized pieces
  • 1 tbsp. vegetable or olive oil
  • 2 cups broccoli slaw
  • 1 red bell pepper, julienned
  • 4 cloves garlic, minced (I used garlic scapes)
  • 1 tbsp. granulated garlic
  • 2 tbsp. soy sauce
  • 1/3 cup chicken broth
  • 2 tsp. cornstarch
  • 2 tsp. ginger, microplaned
  • 6 large flour tortillas
  • 1/2 cup cashew pieces
  • other veggie options - diced diakon radishes, thinly sliced carrots, chopped broccoli florets, sugar snap peas, chopped bok choi, diced green onions the sky is the limit!
Heat a large, deep sided skillet or wok over medium high heat, heat the olive oil.  Add the chicken, the garlic, the ginger, and the granulated garlic and saute about 5 minutes or until chicken is no longer pink.  Add the broccoli slaw, the red pepper, and any other vegetables that you wish to add and saute until they are just starting to sweat.  Add the chicken stock.  Mix the cornstarch and the soy sauce together then add to the skillet, stirring until the sauce has thickened and coated all of the chicken and veggies.  Add the cashews and combine.  Place 1/6 the amount into the middle of the tortillas and roll up.  Enjoy!

Until next time, happy and HEALTHY cooking and EATING!


Crispy Oven Fried Fishwiches and My Mommy's Broccoli Salad

Tuesday, June 29, 2010

HAVE YOU ENTERED THE "MAKE YOUR OWN BABY FOOD KIT" GIVEAWAY YET?
IF NOT, BE SURE TO CLICK HERE! ONLY 2 DAYS LEFT TO ENTER!


Happy Tuesday Everyone!
Welcome to all my new followers from the Monday and Tuesday Blog Hops!  I am so glad you stopped by!
I have been craving fish, which is very hard to come by here in the Midwest.  I am a fish snob from the beautiful Pacific Northwest so when it comes to fresh fish I don't buy anything that comes from a fish farm.  I only spend my money on wild fish, preferably from the Pacific Ocean but in this part of the country I am lucky to get fresh fish from the Atlantic side, so I usually take what I can get.  Last week I was really excited to find some wild Sockeye at the store, something that is VERY hard to find here.  Unfortunately, when I got it home, it had such a terrible fish odor that I nearly vomited and had to throw it away.  Some of you who are not from my neck of the woods might be saying to yourself "but Elizabeth, it is SALMON and salmon is a FISH so it should smell like fish!"  No...no.  Good salmon, especially Wild Pacific Sockeye should NEVER have a fishy odor.  In fact, it should have no odor whatsoever.  If it smells like fish, then it has gone bad and you should not eat it. So there you have it, since moving to the Midwest my diet has gone from eating fish once or twice a week to barely even being able to eat anything but canned tuna more than once a month, if that.   This is the plight of a poor Northwestern girl who got uprooted to the Midwest.  So, I thought I would try again, seeing as my craving for fish keeps getting worse and worse and it was not satisfied, sadly, with the stinky salmon.  I was trying to decide what I could make that did not involve canned tuna, because lets face it, there is only so much you can do with canned tuna and when that is the only fish you have available to you it gets tiring pretty fast.  The store had wild Atlantic Cod on sale today, so I decided maybe that would be a little safer.  I happen to make this recipe a lot as fish sticks, but today I decided to fancy it up by making it into sandwiches.   Back home I used to make the fish sticks out of Halibut - oh how I miss Halibut.  Halibut is my favorite fish.  Second only to Salmon.  Fresh, wild Pacific Salmon - not Atlantic Salmon which is TOTALLY different.  Anyway, if you want to make this into fish sticks, just follow all of the instructions, except when you get to the part where you form them into patties, form them into long sticks instead, or nuggets.  Easy Peasy!  They can be frozen too!  I served these sandwiches up with my mom's broccoli salad which is SOOOOOOOO good!  Try it, you will LOVE it!  We are a broccoli loving family so it is no surprise that this is one of our favorite summer sides!  My mom puts chopped raw red onion in it.  I leave the onion out because raw onion literally makes me sick, but feel free to add it if you like!  During nap time I also threw together some buns in the bread machine and baked them off right before dinner.  I topped the sandwiches with cheddar cheese and homemade tartar sauce.  So yummy!


Crispy Oven Fried Fishwiches

  • 1 lb fresh cod fillets (or other firm white fish- if you are in the PACNW and you have access to Halibut, I HIGHLY recommend using that instead of Cod)
  • 1 egg
  • 2 green onions, finely chopped
  • 1/2 cup carrots finely chopped
  • 2 tsp. dill, divided
  • 2 tbsp. dill pickle relish
  • 1-2 cups bread crumbs 
  • 1/4 cup mayonnaise
  • 1/2 cup sour cream
  • 1 tsp lemon juice
  • 1/2 tsp. fresh ground pepper
  • 1-2 cups cornmeal
  • 2 tbsp. butter, melted or olive oil
  • sliced mild cheddar cheese (if desired)
Line a cookie sheet with aluminum foil and spray generously with cooking spray, set aside.  Place the cod in your food processor and process about 1 minute.  Scrape fish into a bowl and mix with the egg, green onions, carrots, 1 tsp. dill, the relish, and the mayonnaise.  Add the bread crumbs a little at a time until the mixture is "dry" and holds together.  In a shallow dish, mix together the sour cream, lemon juice, the rest of the dill and the ground pepper.  In a second shallow dish, add the cornmeal.  With slightly wet hands, form the fish mixture into patties and coat with the cornmeal.  Place each patty on the cookie sheet.  Cover the patties with plastic wrap and refrigerate for at least one hour (I make these during nap time usually).  Preheat your oven to 450 degrees (yes, your oven needs to be screaming hot).  Remove the patties from the fridge and discard the plastic wrap.  Pour the melted butter or olive oil evenly over the patties- this will help them crisp up in the oven.  Bake for 10-15 minutes or until the edges start to brown.  Turn your broiler on high and broil for about 2 minutes or until the tops are brown and crispy.  BE SURE TO WATCH THEM CLOSELY, they can easily burn.  Add the cheese and broil until melted, if you are using it.  Serve on a crusty roll and top with tartar sauce.  Yummy!

My Mommy's Broccoli Salad

  • 1 large head broccoli, cut into florets
  • 1/2 cup smokehouse almonds
  • 4 slices bacon, cooked and crumbled
  • 1/2 cup raisins 
  • 1/4 cup red onion, finely chopped (I leave this out but Mommy always puts it in)
  • 1/4 cup coleslaw dressing (when I don't make it myself, I use Bolthouse Farms Yogurt dressing, love it, love it, LOVE IT!)


Steam the broccoli until it is just blanched, do not fully cook it. Cool the broccoli in the fridge (or I do it in the freezer, it's faster) Add the rest of the ingredients and stir together.  This is SO yummy, you will be going back for more!


Before I sign off for today, here is a picture of two very lazy dogs.  Very cute, but very lazy.  


Well that's all for now!  Until next time, happy and HEALTHY cooking and EATING!


A Burger Fit for Daddy

Saturday, June 19, 2010

Hello Loyal Readers! Look at this storm that blew through last night!  It was REALLY cool, but also quite nasty.  Anyway...
Before I get started, I would like to take the opportunity to welcome all of my new followers, WELCOME!  Thanks for joining me! And a BIG THANK YOU to all of you who return again and again!  I sincerely appreciate you all!
 I would also like to wish all of my Foodie Daddy readers out there HAPPY FATHERS DAY!  And in honor of Fathers Day, I have come up with a burger fit for a daddy!  The daddy in your life will go absolutely bonkers over these easy and delicious burgers stuffed with caramelized onions and sharp cheddar.  I served them up with a tossed green salad and oven fries.  Yummmmm!


Burgers Stuffed with Caramelized Onions and Sharp Cheddar

  • 1.5 lbs ground beef or ground turkey (I used turkey)
  • 2 tbsp. garlic powder
  • 1 tsp. onion powder
  • 2 tbsp. herbes de provence
  • 1 tbsp. Worcestershire sauce 
  • 1 tsp. dijon mustard
  • 1/2 cup sharp cheddar, grated and divided
  • 1 large sweet onion, sliced
  • 2 tbsp. butter (use only 1 tbsp. if grilling on outdoor grill)
  • 2 tbsp. olive oil (same as with the butter)
  • 1/8 c. dry white wine
Saute the sliced onions in 1 tbsp. of the butter and 1 tbsp. olive oil over medium high heat.  Once the onions start to sweat, add the wine, turn down to medium heat, and cover.  


Let simmer, stirring occasionally until the onions are very soft and brown, about 20 minutes.  


While onions are cooking, in a medium bowl, mix the ground turkey or beef with the onion powder, garlic powder, herbes de provence, Worcestershire sauce, and dijon mustard.  Mix together with your hands until well incorporated.  Divide the meat mixture into 8 rounds.  


Press the rounds out into very thin circles with your hands.  Top 4 of the rounds with 1/4 of the onions and 1/4 of the cheese.  Cover the onions and cheese with another of the rounds. 


 Press the two rounds together around the edges with a fork to seal closed.  If cooking on a grill pan, heat the remaining butter and olive oil over medium high heat. 


 Cook the burgers about 5 minutes on each side, or until cooked through.  If you are grilling them on an outdoor grill, spray with cooking spray and cook over medium high heat until cooked through 5-10 minutes on each side.  Be careful, they will be slightly fragile until cooked.  It is ok if some of the filling seeps out.  


Serve on your favorite bun with your favorite condiments!  Yummy!


In honor of Fathers Day, I would like to feature a picture of my favorite little guy Daniel (we call him Boonie) and his daddy - my husband David.  
Until next time, happy and HEALTHY cooking and EATING!


The Foodie Mommie Copyright © 2009 Designed by Ipietoon Blogger Template for Bie Blogger Template Vector by DaPino